
The official PDF of 4 Creativity in Light and Sound Class 9 — Chapter 4 of the NCERT Madhurima (Arts) textbook — is right on this page. It is a ten-page chapter that runs from printed page 62 to page 71, and the download link sits at the top of the page.
The guide below walks through every section and figure of the current NCERT edition, so you know what the chapter expects you to learn before you open the file; this page is maintained for the current academic session.
Download the 4 Creativity in Light and Sound Class 9 PDF
This is the official NCERT file for Chapter 4 of the Class 9 Madhurima book — the same ten-page chapter that runs from printed page 62 to page 71 of the printed textbook.
If your printed copy of the book is not at hand, Download 4 Creativity in Light and Sound Class 9 PDF from the official NCERT textbook portal — the identical chapter pages that appear in the printed book, in a clean digital file for reading and revision.
The rest of this page explains what is inside the file — every section, figure and activity — so you know what the chapter teaches before you open it.
4 Creativity in Light and Sound at a Glance
The chapter occupies printed pages 62–71 of the book: stage lighting in the first half, theatre sound in the second, with hands-on activities in between. The table below lists what the chapter holds, so you can see its size before you read.
What Chapter 4 Covers: Light First, Then Sound
The chapter is built in two halves. The first half is lighting — how stage lights work, how much control each type gives, and how they are combined. The second half is sound — how a theatre sound system captures, mixes and outputs audio. It closes with artificial intelligence in theatre and the end-of-chapter exercises.
- p. 62 — the opening fantasy-world scenario: a world made entirely of light, used to show what stage lighting can create.
- p. 62 — Lighting: How It All Started: storytelling from cave dwellers to Broadway, moving from sunlight and fire to candles, lamps, tungsten and LED.
- pp. 62–63 — why lighting matters: we see by reflected light, and theatres use a black box approach to control it.
- p. 63 — the Do you know? painting-with-light box, and the six objectives of stage lighting.
- pp. 64–65 — stage lighting equipment: floodlight, PAR, Fresnel, PC and profile spotlight, then Activity 4.1 (making a spotlight and gobo).
- p. 66 — the performance challenge, combination of lights, moving lights, and the light console.
- p. 67 — lighting design: cross, back, top and foot lights, and colour harmony with costumes.
- pp. 67–69 — sound design for theatre: the input–processing–output chain, microphone types, sound console and speakers.
- p. 69 — Activity 4.2, the “designed moment”.
- p. 70 — the field-trip note for teachers.
- p. 71 — AI technology, the discussion circle, and the exercises.
Key Concepts: Beam Control and the Sound Chain
The entire chapter rests on two ideas. For light, the idea is precise control of the beam. For sound, the idea is a chain — capture it, mix it, amplify it, play it out. Keep those two frames and every equipment name falls into place.
Why Lighting Matters: Seeing by Reflected Light
Light is what lets us see. We see an object when light from a source — the Sun or an artificial lamp — falls on it, reflects off it, and reaches our eyes. If an object neither emits nor reflects light, it is invisible to us (NCERT, p. 63).
That is why most theatres take a black box approach: the stage starts as a completely dark space, with no light at all. Starting in darkness minimises stray and unwanted reflections, so every beam you add is deliberate. The chapter states the result plainly: lighting design is precise control of light (NCERT, p. 63).
Why does darkness help? If the stage were already bright or full of reflective surfaces, the light you add would bounce everywhere. Starting from black gives the designer a blank canvas — the same reason a painter starts with a clean white surface. The Do you know?
box on p. 63 makes the comparison directly: visual artists use pigments on canvas, while lighting designers start with a dark space and use colours of light to bring a vision to life.
The Four Stage Light Families Compared
These four fixtures are the equipment core of the chapter. Read the table as a ladder — each fixture down the list gives more control over its beam than the one above it.
| Fixture | Construction | What you can control | Typical use | NCERT page |
|---|---|---|---|---|
| Floodlight | Light source + reflector; no lens | Very little — beam size and shape stay fixed; LED versions avoid the heat | Flooding an area with light | p. 64 |
| PAR (Parabolic Aluminised Reflector) | Lens, reflector and light source sealed in one lamp unit | Beam size and shape are fixed and slightly oval; pan (left–right) and tilt (up–down) only reposition the beam | General stage coverage — bright, even spread | p. 64 |
| Fresnel / PC | Fresnel: lens with concentric rings; PC (Plano-Convex): defined beam edge | Beam size and shape can be shaped; barndoors shape the edge and prevent spillage | Soft-edged pools of light with a controlled border | p. 64 |
| Profile (spotlight) | Lens system with four framing shutters and a gobo slot | Most control: hard or soft edge, beam size and shape, patterns via gobo | Precise focus on a person or area; projecting patterns | p. 65 |
Two automated families extend the ladder (NCERT, p. 66). A moving spot behaves like a profile that can reposition, change colour, use gobos and adjust its beam size and edge; a moving wash behaves more like a PAR.
Fixtures are also never used alone — the chapter’s combination photographs (Figures 4.12–4.14) show how a red PAR and a yellow PC, or a backlight PAR with a floor profile, build one layered stage picture.
The Sound Chain: Capture, Mix, Amplify, Output
Sound design for stage is the art of creating and implementing audio — sound effects, music and dialogue — to enhance a production, without overpowering the actors’ voices (NCERT, p. 67). The equipment follows one three-link chain: inputs capture, the mixer processes, outputs reproduce.
Input — microphones. Mics capture actors’ speech, instruments on stage, and recorded sound from laptops or music players. The four types are built for four different jobs (NCERT, p. 68):
| Microphone type | What it is built for | NCERT page |
|---|---|---|
| Dynamic mic | Cutting external noise, especially on open-air stages | p. 68 |
| Lapel mic | Cordless pickup that allows the actor free movement | p. 68 |
| Hanging mic | Suspended from above for complete sound coverage of the stage | p. 68 |
| Foot mic | Placed on the floor of the stage, usually near the front edge | p. 68 |
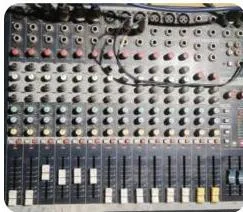
Processing — the sound console. Signals from the inputs become electrical signals and travel to the mixer, also called the sound console. It adjusts volume and combines multiple inputs into a common output.
Each input gets a channel — a vertical strip of knobs and faders — and consoles range from a simple four-channel mixer to mid-range 12–20 channel boards to professional models that exceed 96 channels (NCERT, p. 68).
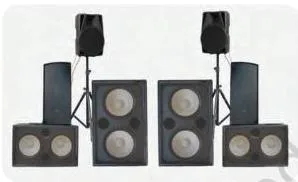
Output — speakers. Speakers convert the electrical output from the amplifier into acoustic sound. Set-ups come in different configurations: mono, stereo and Left Centre Right (LCR) (NCERT, p. 69).
Reading the Figures: Spotlights, Gobos and Microphones
Most of this chapter’s content sits inside its photographs: you are expected to recognise a fixture from its picture and know what it does. Walk through the figures in the order they appear, and the equipment list stops being a list of names.
History first. Figure 4.1 traces the light sources the chapter describes — from the sunlight and fire of early storytellers to candles, lamps and electric light. Each step from flame to LED gave designers more predictable, more controllable light.


Painting with Light: Figures 4.2 and 4.3
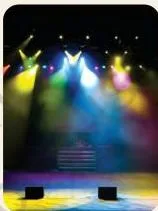
The two pictures on p. 63 explain the difference between a painter and a lighting designer. On a white canvas, pigment colours sit in plain sight — the canvas is already bright, and colours mix where the paint physically overlaps. On a dark theatre stage, the designer starts with black: no light, no colour, nothing visible until a beam is switched on.
Coloured beams mix where they overlap in the air and on the stage, never by touching.
That is why the book calls lighting design painting with light. The creative act is the same as a painter’s, but the “paint” is a beam you can switch on, dim, recolour and redirect. Recognise the pair this way: Fig 4.2 is pigment on white; Fig 4.3 is beams on black.

Now the fixture family, in the chapter’s own order. Each photograph gives you one thing to recognise.
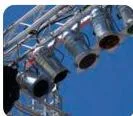
PAR cans (Figure 4.5) look like sealed boxy units, and that is the point: the lens, reflector and light source are one sealed container, so the beam is fixed.
The effect shot (Figure 4.6) shows the result — a whole stage bathed evenly in bright light, which is exactly why the book says PARs give general stage coverage (NCERT, p. 64).
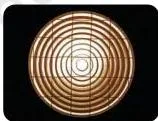
Fresnel (Figure 4.7) is identified by the concentric rings on its lens. If a photo shows rings on the glass, it is a Fresnel — pronounced “fray-nel” (NCERT, p. 64).
PC with barndoors (Figure 4.8) shows the accessory that shapes the beam: hinged flaps fitted in front of the lens that stop unnecessary spillage. The PC-defined edge (Figure 4.9) is the result — a beam whose border cuts off cleanly.
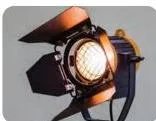
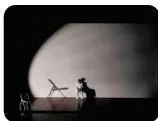
Profile (spotlight) (Figure 4.10) offers the most control of any fixture — hard or soft-edged beam, focused on a specific area, size and shape both adjustable (NCERT, p. 65).
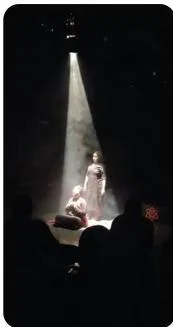
The gobo effect (Figure 4.11) is a profile projecting a stencil pattern through its beam — here a window — to add texture and an extra dimension to the design (NCERT, p. 65).

Combination figures (Figures 4.12–4.14) show fixtures working together: a red PAR beside a yellow PC, a PAR used as a backlight while a profile sits on the floor, and a red PAR wash cut by a white profile pool. The mix of colour and position is deliberate — this is how a designer layers a scene (NCERT, p. 66).
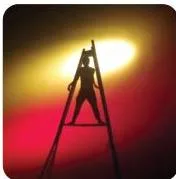
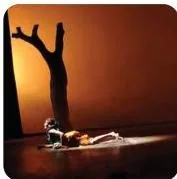
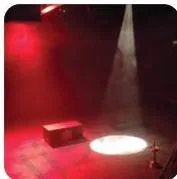
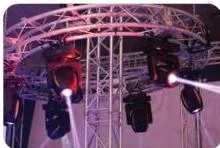
Moving spots (Figure 4.15) are automated profiles on a rig: they can be repositioned as required, change colour, use gobos and adjust their beam. A moving wash behaves more like a PAR (NCERT, p. 66).
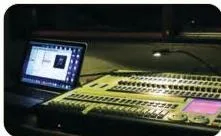
The light console (Figure 4.16) is the single control point for every light: it selects lights, sets intensity, changes colour where supported, and records the whole lighting plan for repeated use (NCERT, p. 66).
Position figures (Figures 4.17–4.19) teach the spatial logic of lighting design. A top light gives a natural overhead effect; a backlight adds depth and silhouette; a footlight lights actors from below for special effects (NCERT, p. 67).
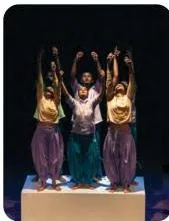
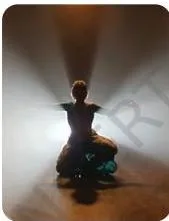
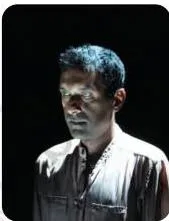
Matching Mics: Figure 4.20
The microphone photograph groups the four mics the chapter expects you to match.
Each solves a different problem: the dynamic mic solves outdoor noise (open-air stages), the lapel mic solves movement (the actor cannot carry a stand), the hanging mic solves coverage (suspended above, it hears the whole stage), and the foot mic solves the front edge (on the floor, it catches what happens near the audience).
When you do Exercise Q3, translate each description into the situation it serves.
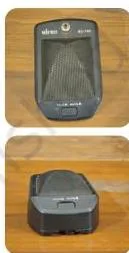
The sound console (Figure 4.21) is the processing heart — vertical strips of knobs and faders, one channel per input. Speakers (Figure 4.22) are the output end, arranged in mono, stereo or LCR configurations.
Use this table as a one-line revision aid for every figure above.
| Figure | What to notice | NCERT page |
|---|---|---|
| 4.1 | Humanity’s light sources, from fire and candles to electric light — a story of growing control | p. 62 |
| 4.2 | Pigment colours on a white canvas: paint mixes by touch | p. 63 |
| 4.3 | Coloured light on a dark stage: nothing visible until light is added | p. 63 |
| 4.5 | PAR cans: sealed lamp, lens and reflector in one unit | p. 64 |
| 4.7 | Fresnel: concentric rings on the lens are the identifying mark | p. 64 |
| 4.8 | PC with barndoors: hinged flaps that shape the beam edge | p. 64 |
| 4.10 | Profile spotlight: the most controllable fixture | p. 65 |
| 4.11 | Gobo effect: a stencil pattern projected through the beam | p. 65 |
| 4.12 | PAR (red) + PC (yellow): coloured fixtures combined | p. 66 |
| 4.16 | Light console: selects, dims, recolours and records every light | p. 66 |
| 4.17 | Top light: natural overhead effect | p. 67 |
| 4.18 | Backlight: depth and silhouette | p. 67 |
| 4.19 | Footlight: special effect from below | p. 67 |
| 4.20 | Different types of mic: four mics for four jobs | p. 68 |
| 4.21 | Sound console: vertical channel strips of knobs and faders | p. 68 |
| 4.22 | Speakers: the output end, in mono, stereo or LCR | p. 69 |
Definitions: Stage Lighting and Sound Terms
The chapter loads many equipment names. This table fixes each one in plain words, so a term you half-remember takes seconds to find.
| Term | Plain definition | NCERT page |
|---|---|---|
| Visibility | The basic job of stage lighting: making performers and objects on stage visible to the audience | p. 63 |
| Black box | A stage design that starts from a completely dark auditorium, minimising stray reflections so every light is deliberate | p. 63 |
| Lighting design | Using the position, colour and control of lights to create effects — the “artwork” that turns equipment into meaning | p. 67 |
| Floodlight | A simple fixture with a source and reflector but no lens; floods an area with light, with very little beam control | p. 64 |
| PAR | Parabolic Aluminised Reflector; a lamp sealed with its lens and reflector in one unit, giving an intense, fixed, slightly oval beam | p. 64 |
| Fresnel | A spotlight (“fray-nel”) named for its concentric-ring lens, offering some control over beam size and shape | p. 64 |
| PC | Plano-Convex; a Fresnel-like light with a more defined beam edge | p. 64 |
| Barndoors | Hinged flaps fitted in front of a light to shape the beam and prevent spillage | p. 64 |
| Profile spotlight | The most controllable fixture; projects hard or soft-edged beams of controlled size and shape | p. 65 |
| Framing shutters | The four shutters inside a profile that allow precise shaping of the beam | p. 65 |
| Gobo | A stencil inside a profile that projects a pattern (like a window) through the beam, adding texture | p. 65 |
| Moving spot / moving wash | Automated fixtures: the spot behaves like a profile, the wash like a PAR; both reposition as required | p. 66 |
| Light console | The central control of the lighting system: selects lights, sets intensity, changes colour and records the design | p. 66 |
| Cross light | Light from the sides that shapes the actors | p. 67 |
| Backlight | Light from behind that adds depth and silhouette | p. 67 |
| Top light | Light from directly overhead, creating a natural effect | p. 67 |
| Footlight | Light from the floor near the front edge, used for special effects | p. 67 |
| Sound design | Creating and implementing audio (effects, music, dialogue) that enhances the production without overpowering the actors | p. 67 |
| Dynamic mic | A mic that cuts external noise, suited to open-air stages | p. 68 |
| Lapel mic | A cordless mic that allows the actor free movement | p. 68 |
| Hanging mic | A mic suspended above the stage for complete sound coverage | p. 68 |
| Foot mic | A mic placed on the floor of the stage, usually near the front edge | p. 68 |
| Sound console (mixer) | The processing unit that adjusts volume and mixes many inputs into one output; channels are vertical strips of knobs and faders | p. 68 |
| LCR | Left Centre Right — a speaker configuration, alongside mono and stereo | p. 69 |
Common Mistakes Students Make in This Chapter
The errors in this chapter are not about remembering names; they are about swapping the controls of one fixture for another. Fix these seven, and the equipment section is done.
| Mistake | Correct rule | How to check your answer |
|---|---|---|
| Thinking a PAR’s pan and tilt is beam control | Pan and tilt only reposition the beam; its fixed oval size and shape never change | Ask: can this fixture change the beam’s shape? For a PAR, no — only where it points (NCERT, p. 64) |
| Calling the floodlight the most controllable fixture | It is the least controllable — source plus reflector, no lens, very little control over beam size and shape | Check the construction: no lens means little control (NCERT, p. 64) |
| Mispronouncing Fresnel | It is “fray-nel” | Link the name to the concentric-ring lens and say it aloud once (NCERT, p. 64) |
| Thinking a gobo is a coloured filter | A gobo is a stencil pattern inside a profile that the beam projects, adding texture like a window | Trace where the pattern comes from — the stencil, not a gel in front of the light (NCERT, p. 65) |
| Swapping microphone jobs | Lapel = free movement; dynamic = cutting external noise on open-air stages; hanging = complete coverage; foot = front edge | Re-read the descriptions under Fig 4.20 before answering Exercise Q3 (NCERT, p. 68) |
| Choosing light colours that match the costumes | Light and costume colours must harmonise; when they clash or merge, actors wash out | For Exercise Q2: red light on red costumes merges with them, so the soldiers disappear (NCERT, pp. 67, 71) |
| Believing AI replaces designers | AI adapts light and sound in real time, but it empowers designers to work faster and experiment more boldly — it does not replace them | Keep the chapter’s framing: technology supports the designer (NCERT, p. 71) |
The Two Activities: Build a Gobo and Design a Moment
This is a practical chapter. Its two activities are where the ideas stop being theory — Activity 4.1 makes the equipment, Activity 4.2 makes a mood.
Activity 4.1: Make a Simple Spotlight and Gobo (NCERT, p. 65)
You need, per group of 5–6 students: a torch (or flashlight or phone torch), black chart paper, thick black paper or thin cardboard, tape and scissors.
- Wrap the black chart paper around the torch near the light source, like a tube, so no light leaks or spreads. Attach it securely with tape.
- Switch on the torch and observe how the tube narrows and focuses the beam.
- Draw a simple shape on the thick black paper — tree branches, window bars, rain lines, stars.
- Carefully cut the shapes out, like a stencil (the teacher assists).
- Tape the cut-out in front of the spotlight tube. Adjust the distance between the light source and the gobo to get sharp shadows.
- Shine the light onto a wall — you will now see patterned light.
Performance challenge (NCERT, p. 66): each group must create a 1-minute scene using the gobo image as the centre of the scene. For a tree gobo, for example: a woodcutter comes to cut the tree for timber, but a child stops him and protects the tree.
Activity 4.2: Design a “Designed Moment” (NCERT, p. 69)
The teacher introduces a 10–15 second dramatic situation — a lost child in a forest, a hero discovering a hidden treasure, a magical door opening. Working in small groups, students decide four things:
- Which colour light best suits the mood?
- Which direction should the light come from — top, side or front?
- What sound would accompany the moment?
- How to stage the scene using classroom objects as props — a water bottle as a tree, a pen and small pencil as a parent walking with a child, or stick puppets from the Grade 6 Kriti theatre section.
One student holds a torch covered with a coloured sheet and points it at a small object on the desk to simulate stage lighting; another plays the chosen sound clip from a phone or laptop. The group then presents its “designed moment” to the class and explains its choices.
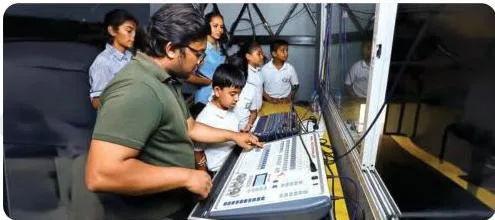
Field-trip note (NCERT, p. 70): the chapter recommends taking students to a real auditorium so a technical professional can explain the equipment — Figure 4.23 shows exactly that. If your school arranges the trip, take the fixture list from this page with you.
How to Prepare This Chapter for Assessment
This chapter has no formulas to memorise — assessment is conceptual and hands-on. Prepare to explain choices with reasons, not just to recall definitions.
After studying, you should be able to:
- Explain why light is needed to see anything on stage — the reflected-light idea (NCERT, p. 63).
- List the six objectives of stage lighting without prompting (NCERT, p. 63).
- Compare floodlight, PAR, Fresnel/PC and profile by how much beam control each gives (NCERT, pp. 64–65).
- Match the four microphone types to the situations they are built for (NCERT, p. 68).
- Justify a lighting or sound choice with a reason — the reasoning matters more than the name.
The end-of-chapter exercises test exactly these skills.
- Q1 asks the purpose of lights for a play and the types commonly used. A complete answer states the six objectives from p. 63, then lists the fixtures: floodlight, PAR, Fresnel, PC and profile spotlight, plus moving spot and moving wash (NCERT, pp. 64–66).
- Q2 asks whether red light still works when the soldiers on stage wear red costumes. The answer is no: the red light and red costume merge, so the effect is that the actors wash out. A complete answer states the decision, names the effect, and gives the reason from p. 67 — lighting colours must harmonise with costumes and sets (NCERT, pp. 67, 71).
- Q3 is the mic-matching question. Matching the chapter’s descriptions gives: lapel mic → seminar/talk by the chief guest (free movement); dynamic mic → play performance (cutting external noise on an open-air stage); foot mic → catching minute sounds near the front edge (NCERT, p. 68).
Activity 4.1, Activity 4.2 and the gobo performance challenge are the chapter’s practical core — treat them as learnable content, because they are where the equipment ideas become real.
One honest note: textbook contents and the examinable syllabus are not always identical — check the current official syllabus on cbse.gov.in before deciding what to prioritise. The Class 9 Arts hub has the rest of the book’s chapters for revision.
Chapter 4 in One Page: Rapid Revision
Everything the chapter teaches, compressed into the points that matter — read this ten minutes before anything else.
- We see objects only by reflected light: a source lights the object, the object reflects it, the light reaches our eyes. No emission, no reflection, no visibility (NCERT, p. 63).
- The black box approach starts from a dark space to minimise stray reflections — lighting design is precise control of light (NCERT, p. 63).
- Six objectives of stage lighting: visibility; information about the scene (day/night, indoor/outdoor); mood; visual composition and highlighting; drawing attention; symbolism and special effects (NCERT, p. 63).
- The control ladder: floodlight (almost no control) → PAR (fixed oval beam, pan and tilt only) → Fresnel/PC (beam shaping with barndoors) → profile (full control with shutters and gobo) (NCERT, pp. 64–65).
- The light console selects, dims, recolours and records every light — the sole control point during a show (NCERT, p. 66).
- Position creates meaning: cross lights shape from the sides, backlight adds depth and silhouette, top light gives a natural overhead effect, footlight works from below for special effects (NCERT, p. 67).
- Sound design is the input–processing–output chain: mics capture, the sound console mixes, speakers output in mono, stereo or LCR (NCERT, pp. 67–69).
- Mic jobs: dynamic cuts external noise (open-air stages), lapel allows free movement, hanging covers the whole stage, foot sits at the front edge (NCERT, p. 68).
- Light and sound must harmonise: clashing or merging tones wash out actors and distort the intended mood (NCERT, p. 67).
- AI adapts light and sound in real time, but it empowers designers — it does not replace them (NCERT, p. 71).
Related Resources for Class 9 Madhurima
This listing is maintained for the 2026-27 academic session using the NCERT textbook information available to us. NCERT remains the authority for confirming the latest edition.
The Madhurima book lives inside the Class 9 Arts section. The links below get you to the book, the hub, and the chapters on either side of this one.
- Madhurima Class 9 Arts book page — the full index of the book this chapter belongs to.
- Class 9 hub — every Class 9 subject page in one place.
- CBSE notes home — the starting point for notes across all classes and subjects.
- Symbols and Metaphors on Stage — the previous chapter, on how objects and actions carry meaning in theatre.
- From Vision to Performance: Direction and Acting — the chapter that follows this one.
Sources and Data Verification
| What the chapter holds | Count | Where it is used |
|---|---|---|
| Printed pages | 10 | |
| Figures with NCERT captions | 26 | |
| Activities | 2 | |
| Official NCERT PDF | Download the chapter PDF | the chapter exactly as NCERT publishes it |
Reference: NCERT Class 9 Madhurima (Arts) textbook, Chapter 4, official edition on ncert.nic.in. The page numbers and figure captions quoted on this page follow the printed NCERT edition of Madhurima for Class 9.
This page covers only Chapter 4, “Creativity in Light and Sound”, of that book — not other chapters, classes or subjects. NCERT publishes the textbook, its editions and the official chapter PDF; CBSE defines the examinable syllabus. Textbook contents and the examinable syllabus are not always identical, so confirm the current syllabus on cbse.gov.in.
Frequently Asked Questions
What is the purpose of stage lighting in NCERT Class 9 Madhurima Chapter 4?
Stage lighting exists, first, to make the stage visible, and then to shape how the audience reads the scene. The chapter lists six objectives: visibility; information about the scene (day/night, indoor/outdoor); mood; visual composition and highlighting; drawing attention; and symbolism and special effects (NCERT, p. 63). Fixture choice, colour and position all serve one of these six.
Which types of stage lights does the chapter describe and how do they differ?
The chapter describes five main fixtures plus two automated types: floodlight, PAR, Fresnel, PC and profile spotlight, with moving spots and moving washes as the automated options (NCERT, pp. 64–66). They differ mainly in how much beam control each gives — from the floodlight’s fixed spread to the profile’s shutters, gobo and hard-or-soft edge.
What is a gobo and how do you make one with a torch?
A gobo is a stencil pattern placed inside a profile spotlight; the beam projects the pattern — like a window — onto the stage, adding texture (NCERT, p. 65).
To make one: wrap black chart paper round a torch as a tube, cut a shape out of thick black paper like a stencil, tape it in front of the tube, and adjust the distance between the torch and the gobo to sharpen the shadow (NCERT, p. 65).
Which microphone type suits which situation on stage?
Match the mic to the job: a lapel mic for actors who need free movement; a dynamic mic to cut external noise on open-air stages; a hanging mic for complete coverage from above; a foot mic placed on the floor near the front edge (NCERT, p. 68).
In Exercise Q3’s terms: lapel → seminar talk by the chief guest, dynamic → play performance, foot → catching minute sounds.
Should you use red light on actors wearing red costumes?
No — the red light and the red costumes merge, so the actors wash out. The chapter warns that lighting colours must harmonise with costumes and sets; when they do not, actors can disappear or the intended mood is distorted (NCERT, p. 67). A contrasting colour keeps the soldiers visible while still reading as a battle scene.
Does AI replace lighting and sound designers in theatre?
No. The chapter describes smart lighting that adjusts colour, intensity and focus in real time as actors move, and AI sound tools that generate adaptive soundscapes — but it states clearly that these innovations do not replace human designers; they empower designers to work faster, experiment more boldly, and create immersive theatre experiences (NCERT, p. 71).
Reference: NCERT Class 9 Madhurima (Arts) textbook, chapter 4, official edition on ncert.nic.in.
Explore Class 9 Arts Books
- Previous: Symbols and Metaphors on Stage
- Next: From Vision to Performance: Direction and Acting
Related chapters:
- History of Arts
- Theatre
- The Science of Music