
Work with Life Forms Class 7 is the first chapter of the NCERT Kaushal Bodh (Vocational Education) textbook for Class 7 — a 24-page project chapter built around the Plant Nursery project, and the official chapter PDF is right below.
Before you open the file, this page maps what is inside: the seven activities you will do, the one formula you will use, the records you must keep, and the figures that show how to build the nursery step by step.
Download the NCERT Class 7 Kaushal Bodh Chapter 1 Work with Life Forms PDF
The file below is the complete official chapter as NCERT published it — 24 printed pages with every activity, table, formula and figure — so you can work through the Plant Nursery project from the book itself.
Download the NCERT Class 7 Kaushal Bodh Chapter 1 Work with Life Forms PDF (file gekb101.pdf) from the official NCERT website — the same file the teacher uses in class.
| What the chapter holds | Count | Where it is used |
|---|---|---|
| Printed pages | 24 | |
| Figures with NCERT captions | 26 | |
| Tables | 4 | |
| Official NCERT PDF | Download the chapter PDF | the chapter exactly as NCERT publishes it |



Reference: NCERT Class 7 Vocational Education textbook, chapter 1, official edition on ncert.nic.in.
Work with Life Forms Class 7 Chapter 1 at a glance: a project chapter, not a theory chapter
This is a skills project chapter: you do the work, and the work is the learning. There is no list of laws or theorems to memorise — the chapter teaches by making you plan, build, sow and record.
- Life forms means all living things — human beings, mammals, birds, fish, plants, insects, reptiles and even bacteria and viruses (NCERT, p. 1).
- The chapter offers two sample projects, Plant Nursery and School Habitat Garden, and you take up only one (NCERT, p. 1).
- From page 3 to page 24 the whole file is the Plant Nursery project: seven activities in sequence, from visiting a nursery to calculating costs.
- Three ways to make new plants: sowing on raised beds, sowing in plug or seedling trays, and stem cuttings (NCERT, pp. 17–20).
- Three record tables to keep: Table 1.1, Table 1.2 and Table 1.3 (NCERT, pp. 10, 21–22).
- One formula to learn and use: germination percentage (NCERT, p. 15).
- Two “Did you know?” boxes — the giant banyan tree (NCERT, p. 5) and the Seed Mother of India, Rahibai ji (NCERT, p. 17).
- No separate end-of-chapter exercise set: the questions sit inside the activities and in the closing “Think and Answer” reflection (NCERT, p. 24).
For the chapter’s totals — sections, figures, tables and questions — use the chapter counts table that accompanies this page.
What the chapter covers: the Plant Nursery project, activity by activity
The goal of the Plant Nursery project is to build a working nursery in the school while learning what young plants need and the different ways new plants are made.
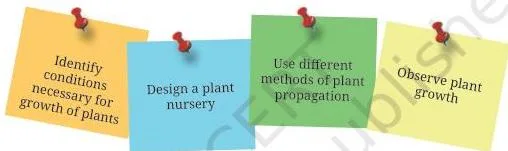
The project opens with four “What will I be able to do?” outcomes (NCERT, p. 5). By the end, you should be able to:
- describe the needs of germinating seeds and young plants;
- cultivate new plants using different plant propagation methods;
- provide suitable conditions for the initial growth of plants;
- develop a plant nursery in the school.
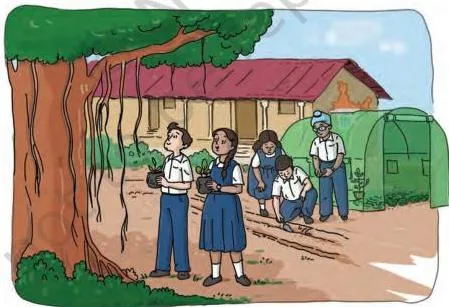
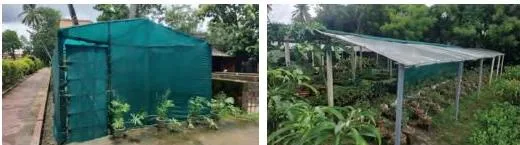
Figure 1.1 shows the end goal — a school plot turned into a working nursery.
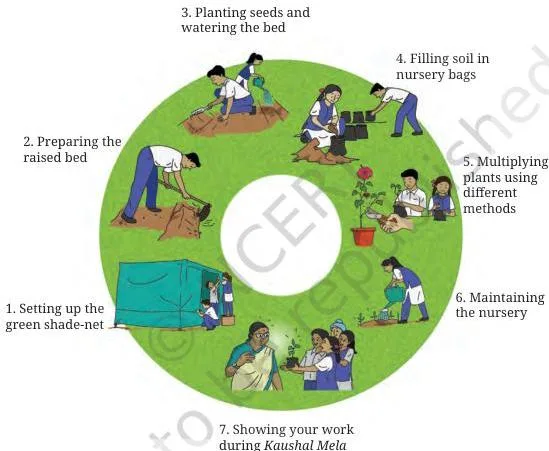
Every activity builds towards this image. The sequence runs in seven steps, and each step produces something you can check.
- Activity 1 — Visit a nearby plant nursery. Observe how air, sunlight, water, humidity, temperature and nutrition are maintained; ask questions; and fill Table 1.1 with the expert’s help (NCERT, pp. 8–10).
- Activity 2 — Plan and lay out the nursery. Choose the site, measure the area, and draw a layout sketch showing pathways, the water source and the beds (NCERT, pp. 11–12).
- Activity 3 — Prepare the land and set up the shade-net. Clean the area, mark it with lime powder, fix poles, install the shade-net and fence the nursery (NCERT, pp. 13–14).
- Activity 4 — Germinate seeds. Run the germination test on 100 seeds and calculate the germination percentage (NCERT, pp. 14–15).
- Activity 5 — Raise plants in the nursery. Sow seeds on raised beds or in plug trays, and raise plants from stem cuttings (NCERT, pp. 16–20).
- Activity 6 — Watch plants grow. Maintain the growth record in Table 1.2 (NCERT, p. 21).
- Activity 7 — Calculate the cost. Record costs in Table 1.3, which decides the selling price the plants can fetch (NCERT, p. 22).
Activity 1 sends you to a real nursery first: you plan better after watching an expert work. Figure 1.4 shows the kind of place you will visit.
On the visit, observe how air, sunlight, water, humidity, temperature and nutrition are kept under control (NCERT, p. 8).
The book gives ready-made questions to ask: how plants get the right amount and duration of sunlight, how shade is provided, how ideal temperature and humidity are maintained, how damage from pests and animals is prevented, and how plants are transported to homes and farms (NCERT, p. 9).
Activity 6 is where the nursery starts to pay off. Figure 1.5 shows what all the sowing methods are for.
These are healthy nursery plants, ready to be used in the school, given to others, or transferred from beds and trays to nursery bags and other parts of the school (NCERT, p. 11).
The chapter then makes you reflect on the work. You write the three most useful things you learned from the nursery visit and from working with a peer, and you log how many periods each activity took (NCERT, p. 23).
The closing “Think and Answer” block asks four questions: what you enjoyed, the challenges you faced, what you would do differently next time, and which jobs are related to this work (NCERT, p. 24).
Key concepts: what plants need, and how a nursery provides it
The activities only make sense if you know why a nursery does what it does. This is the biology the project depends on.
The chapter’s central claim sits on NCERT pages 3–4: plants need air, sunlight, nutrients and water, and beyond that they need a favourable environment — the right humidity, temperature and soil moisture. A nursery creates exactly that.
- Plant propagation — making new plants. New plants come from seeds, from branches of the mother plant, and from tubers such as potatoes (NCERT, p. 3).
- The water-stream clue — more plants grow near streams, ponds, wells and water-taps because there they get optimum temperature, humidity and soil moisture (NCERT, p. 4).
- What a nursery is for — preserving original plant species, creating new varieties, producing plants on a very large scale, and shielding young plants from pests and unsuitable conditions such as heavy rain or severe heat (NCERT, p. 5).
- Year-round growing — because healthy conditions can be created, plants can be grown whenever required, not only in their naturally suitable seasons (NCERT, p. 5).
- Nurseries differ by region — vegetables like brinjal, tomato and onion, and crops like banana, in agricultural areas; rose and marigold in urban areas; mango and coconut in coastal and hilly areas (NCERT, p. 7).
- Space is flexible — nurseries run on plots of land, on terraces, along unused spaces, and in pots (NCERT, pp. 7, 12).
- Why raised beds work — extra water drains from the root zone, and roots get air for respiration (NCERT, p. 17).
- Growing media — material such as cocopeat manages moisture around roots better than plain soil, helps avoid disease spread, and provides nutrients for growth (NCERT, pp. 18–19).
- Stem cuttings — hardwood (rose, bougainvillea), semi-hardwood (dieffenbachia, croton) and softwood (duranta, alternanthera) (NCERT, p. 19).
Figure 1.2 opens the section with the scale of what one seed can do.
This banyan tree, Thimmamma Marimanu, stands in Ananthapuramu district of Andhra Pradesh and spreads over 5 acres — about the size of a small village (NCERT, p. 5). It grew from a single seed and provides shade, oxygen and shelter to birds, animals and humans. That is plant propagation at its largest scale.
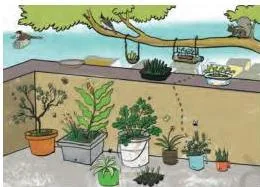
Where can a nursery live? Figure 1.7 shows the options the book offers.
If a 150–200 square foot plot is not available, use any unused space, a pathway, a parking lot, or plant in pots (NCERT, pp. 11–12). A nursery does not need a farm — it needs sunlight and drainage.
The chapter’s second “Did you know?” box is about a person. Figure 1.12 shows Rahibai Soma Popere, known as the Seed Mother of India.
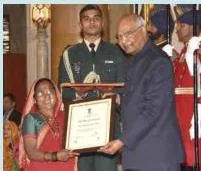
Rahibai ji, a Padma Shri and Nari Shakti Puraskar recipient, built a seed bank in her small home and conserved more than 43 indigenous crop varieties and wild food resources (NCERT, p. 17). Her work matters because many native plant species are at risk of being lost — preserving them is what a seed bank does.
Materials and safety rules: gather these before you start
Before any activity begins, collect the kit. The chapter’s list is ordinary gardening tools plus a few nursery-specific materials, and it is followed by seven safety rules you must follow.
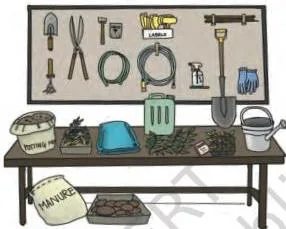
Figure 1.3 shows the tools and materials the project needs.
Connect each tool to its job: the garden shovel and spade dig and lift soil, the hand cultivator loosens it, the grafting knife and pruning shears prepare cuttings, the watering can waters gently, and gardening gloves protect your hands.
Gardening tools and nursery materials
From NCERT page 6, the tools are:
- garden shovel, spade and hand cultivator — for digging and loosening soil;
- grafting knife, pruning shears (secateurs) or sharp cutter — for preparing cuttings;
- watering can and gardening gloves.
And the nursery materials are:
- seedling or plug tray; cocopeat; sphagnum moss or coco husk;
- compost or manure; seed germination paper or cardboard (45 cm by 28 cm);
- shade-net; bamboo or wooden pole (8 ft high); PVC pipe; tarpaulin sheet; bricks;
- measuring tape; plant labels; first-aid kit; lime powder.
This image shows the items that turn a bare plot into a nursery structure: the shade-net, bamboo or wooden poles, PVC pipe and tarpaulin for the cover, bricks for edges, and measuring tape, plant labels, the first-aid kit and lime powder for marking and labelling (NCERT, p. 6).
Seven safety rules before you start
The book lists these precautions before any nursery work (NCERT, p. 6):
- Always use the right tool and equipment for the job.
- Follow instructions: heavy tools like spades, shovels and pickaxes need caution, and sharp tools like cutters and knives need care.
- Wear gloves that fit well so you have a good grip.
- Ask for help if you are unsure about how to use a tool.
- Wash hands carefully after working with soil — it may contain disease-causing micro-organisms.
- Bend your knees, not your back, when lifting heavy weight.
- Hang tools on racks or place them in marked storage places.
Internet safety (NCERT, p. 6): ask the teacher before going online, do not upload or download anything without checking, and never share personal information.
This list is the chapter’s safety contract: the book expects each rule to be followed before you touch a tool.
Figure walkthrough: building the nursery step by step
The figures in this chapter are not decoration. Read in order, they act as a photo manual for building and stocking a nursery.
Figure 1.6 comes first: plan the layout before you dig.
Choose a spot that gets at least 2–3 hours of sunlight and does not waterlog; about 150–200 square feet is enough (NCERT, p. 11). Then draw a sketch with dimensions, showing pathways, the water source and the beds, before you touch the soil.
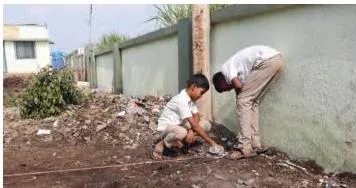
Figure 1.8 shows the marking step.
Clean the area first — remove unwanted plants, debris and rocks — then mark the nursery boundary and the positions of beds and pathways with lime powder (NCERT, p. 13).
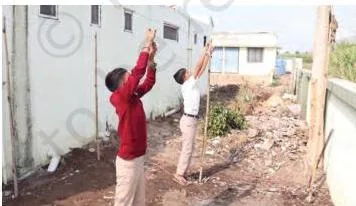
Figure 1.9 shows how the poles go up.
Bamboo or wooden poles carry the shade-net. On a terrace or concrete floor, fix the poles using metal tin boxes or a plastic drum filled with sand (NCERT, p. 13).
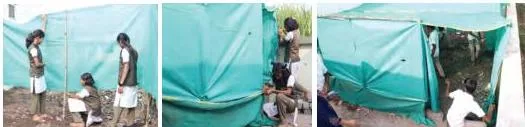
Figure 1.10 shows the shade-net going on.
Choose a green shade-net with a 50% or 75% shading percentage, based on plant need. No shade-net available? Tree branches or old cloth (sarees) work as substitutes. A fence of discarded pipes, rods, bamboo or fallen branches keeps animals and people out (NCERT, pp. 13–14).
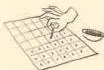
Figure 1.11 is the germination test — the chapter’s one calculation.

On a sheet of germination paper (45 cm by 28 cm), mark 3 cm by 3 cm squares, soak the paper, place 100 seeds at equal distances, roll it, and keep it for 3–5 days. Then count the germinated seeds and apply the formula explained below (NCERT, pp. 14–15).
Figure 1.13 shows the raised bed, and Figure 1.14 shows the digging that comes first.
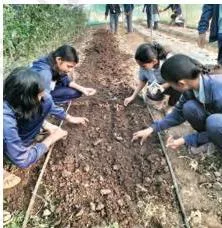
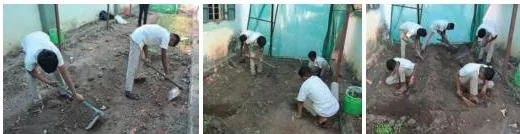
Loosen the soil, remove stones, and mix compost and soil in about a 40:60 ratio. Raise the bed 15–20 cm above the ground; 3–5 m by 1–1.5 m is a workable size, with 0.30–0.40 m between beds for watering and weeding (NCERT, p. 17).
The three propagation methods compared
These are the chapter’s three ways of making new plants (NCERT, pp. 17–20):
| Method | What you need | Space needed | Best use |
|---|---|---|---|
| Sowing on raised beds | A prepared bed with a 40:60 compost–soil mix, seeds, watering can | 3–5 m by 1–1.5 m per bed, with 0.30–0.40 m paths | Vegetable and flower seedlings grown in open soil (NCERT, pp. 17–18) |
| Sowing in plug or seedling trays | Plug tray, soaked cocopeat, tarpaulin or gunny bag | Very little — trays sit under the shade-net | Limited space, and producing seedlings on a large scale (NCERT, pp. 18–19) |
| Raising plants from stem cuttings | Nursery bags or 500 ml milk-pouches, soil–compost mixture, rooting hormone | Small — bags stand in rows | Plants that grow from hardwood, semi-hardwood or softwood shoots, such as rose, bougainvillea, duranta (NCERT, pp. 19–20) |
Figure 1.15 shows the tray method, and Figure 1.16 shows the cutting method.
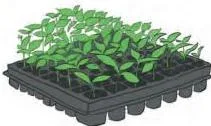
Fill a plug tray’s cells with soaked cocopeat, sow 1–2 seeds per hole, cover the tray with a tarpaulin or gunny bag for 2–3 days, then move it under the shade-net (NCERT, pp. 18–19).
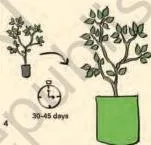
From a mature, healthy parent plant, cut a 10–15 cm (4–6 inch) stem with at least 2–3 nodes. Make a 45-degree slant cut at the base for a larger rooting surface, dip it in rooting hormone powder or gel, and roots form in 30–45 days (NCERT, p. 20).
Nursery bags of 5 by 4 inches hold the cuttings — the book also suggests old 500 ml milk-pouches as a low-cost substitute (NCERT, p. 20).
The germination formula: what it means and how to use it
Germination percentage tells a nursery how many of its seeds are likely to sprout. The book makes you test this before sowing so that space, effort and time are not wasted (NCERT, pp. 14–15).
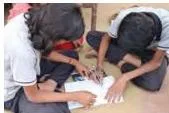
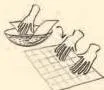
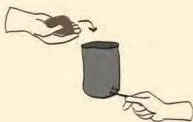
The test runs on seed germination paper, shown here — the paper holds moisture so seeds stay evenly damp; a cardboard sheet is the book’s substitute (NCERT, p. 15).
The formula from NCERT page 15:
\[ \text{Germination percentage} = \frac{\text{Number of seeds germinated}}{\text{Total number of seeds placed / sown}} \times 100 \]
What each part means:
- Number of seeds germinated — the seeds that actually sprouted during the test.
- Total number of seeds placed / sown — every seed you put into the test, whether it sprouted or not.
- Multiplying by 100 — turns the fraction into a percentage, so you can compare batches and read seed-packet labels, which print the germination rate (NCERT, p. 15).
Worked example: finding the germination percentage
A student rolls 100 chickpea seeds in germination paper. After 4 days, 83 have sprouted. What is the germination percentage?
Step 1: Identify the numbers.
Seeds germinated = 83; total seeds placed = 100.
Step 2: Substitute into the formula.
\[ \text{Germination percentage} = \frac{83}{100} \times 100 = 83\% \]
Result: the germination percentage is 83% — the same kind of figure printed on seed-packet labels (NCERT, p. 15).
Worked example: sowing the right number of seeds
Suppose the germination rate is 75% and the class wants 60 seedlings. How many seeds should you sow?
Step 1: Divide the plants wanted by the germination rate.
\[ \text{Seeds to sow} = \frac{60}{0.75} = 80 \]
Step 2: Check: \(0.75 \times 80 = 60\).
Exactly 60 plants are expected.
Result: sow 80 seeds. This is the rule behind the book’s line on NCERT page 16: the number of seeds you use must be greater than the number of plants you wish to grow.
Definitions: the terms your project log needs
The project records — Table 1.1 and the growth log — expect you to use this vocabulary correctly. Here is what each term means in this chapter.
| Term | What it means in this chapter | Where you will use it |
|---|---|---|
| Life forms | All living things — human beings, mammals, birds, fish, plants, insects, reptiles, and even bacteria and viruses | Opening of the chapter (NCERT, p. 1) |
| Plant nursery | A space where young plants are raised under controlled, favourable conditions | The whole project (NCERT, pp. 3–5) |
| Plant propagation | Making new plants — from seeds, from branches of the mother plant, or from tubers such as potatoes | Activity 1 and Activity 5 (NCERT, p. 3) |
| Germination | A seed sprouting into a young plant | Activity 4 (NCERT, pp. 3, 14–15) |
| Germination percentage | The share of sown seeds that actually sprout, written as a percentage | Activity 4 and the formula (NCERT, p. 15) |
| Shade-net | A net that reduces sunlight so young plants are protected from excessive heat and heat stress | Activity 3 (NCERT, p. 13) |
| Growing media | Material such as cocopeat that holds moisture around roots, helps avoid disease spread and supplies nutrients | Seedling trays (NCERT, pp. 18–19) |
| Raised bed | A bed raised 15–20 cm above ground so excess water drains from the root zone and roots get air | Activity 5, Method 1 (NCERT, p. 17) |
| Reserve food | Carbohydrates, proteins, vitamins and nutrients stored in seeds and cuttings, used during germination and initial growth | Activity 5 (NCERT, p. 16) |
| Softwood, semi-hardwood and hardwood cuttings | Stem-cutting types based on how mature and woody the shoot is | Method 3 (NCERT, p. 20) |
| Nursery bag | A small planting bag (5 by 4 inches) with 2–3 drainage holes, filled with a soil–compost mixture | Method 3 (NCERT, pp. 19–20) |
Common mistakes that hurt young seedlings
Most problems in a school nursery come from a handful of repeated errors. The chapter’s instructions are written to stop exactly these — check yourself before each activity.
| Mistake | Why it hurts | The rule that fixes it |
|---|---|---|
| Sowing everything without the germination test | The nursery may fall short of seedlings | Test first; then sow more seeds than the number of plants wanted (NCERT, pp. 14–16) |
| Using the formula the wrong way round | Wrong rate means wrong seed quantity | Use \(\frac{\text{germinated}}{\text{sown}} \times 100\), never the reverse (NCERT, p. 15) |
| Choosing a shady or waterlogged spot | Young plants need 2–3 hours of sunlight; waterlogged roots suffer | Select a site with at least 2–3 hours of sunlight that avoids waterlogging (NCERT, pp. 11–12) |
| Using no shade, or the wrong shading percentage | Delicate seedlings suffer heat stress | Install a 50% or 75% green shade-net, or use tree branches and old cloth (NCERT, pp. 13–14) |
| Planting tiny seeds too deep | Seedlings struggle to emerge | Mix tiny seeds with fine sand or soil and cover lightly (NCERT, p. 18) |
| Forgetting drainage holes in nursery bags or trays | Roots suffocate in waterlogged growing media | Make 2–3 small holes at the bottom of each bag (NCERT, p. 20) |
| Stripping a softwood cutting of all its leaves | Cuttings lack food reserves and need leaves to survive | Retain the top two to three leaves and remove the rest (NCERT, p. 20) |
| Skipping the safety rules | Injury, and infection from soil | Wear well-fitting gloves, wash hands after soil work, and ask before using sharp tools (NCERT, p. 6) |
How the project is assessed: the records you must keep
This is an activity-based skill chapter, so your “answer script” is the record you build while working. The evidence of learning is the project log, not a question paper.
The record you build
- Table 1.1 — the plan. The plant-by-plant plan written with the expert’s help after the nursery visit (NCERT, p. 10).
- Table 1.2 — the growth record. For every plant produced: the method used, the quantity of seeds or cuttings, the planting date, the date of germination or first leaf, and any observation (NCERT, p. 21).
- Table 1.3 — the cost sheet. Item, unit cost, quantity and total price, which decides the selling price the plants can fetch (NCERT, p. 22).
- The time log. How many periods each of the seven activities took (NCERT, p. 23).
- “What did I learn from others?” Three most useful things from the visit or expert, and three things learned while working with a peer (NCERT, p. 23).
- Think and Answer. Four reflections — what you enjoyed, the challenges you faced, what you would do differently, and jobs related to this work (NCERT, p. 24).
Jobs connected to the Plant Nursery project
The book names five jobs for the final question (NCERT, p. 24):
- Gardener — tends plants, beds and gardens.
- Botanist — studies plants and plant science.
- Forest officer — protects forests and forest land.
- Farmer — grows crops and raises plants for food.
- Agriculture scientist — researches better ways to grow plants and improve crops.
The book asks you to look around, speak to people and add your own examples of jobs connected to the work you did.
One honest caveat: textbook contents and the examinable syllabus are not always identical. Check the current official syllabus for how this skill course is assessed.
Revision summary: the chapter in one screen
One minute before the activity? This is the chapter’s numbers and order, all together.
| Measurement | Value from the book |
|---|---|
| Sunlight needed | At least 2–3 hours a day (NCERT, p. 11) |
| Nursery area | About 150–200 square feet (NCERT, p. 11) |
| Shade-net shading | 50% or 75%, by plant need (NCERT, p. 13) |
| Germination test | 100 seeds (NCERT, p. 15) |
| Test duration | 3–5 days (NCERT, p. 15) |
| Germination paper | 45 cm by 28 cm (NCERT, pp. 6, 15) |
| Bed compost:soil ratio | About 40:60 (NCERT, p. 17) |
| Bed size | Raised 15–20 cm; 3–5 m long; 1–1.5 m wide (NCERT, p. 17) |
| Between beds | 0.30–0.40 m (NCERT, p. 17) |
| Seeds per tray cell | 1–2 seeds (NCERT, p. 19) |
| Cocopeat | 1 kg absorbs 5–8 litres of water (NCERT, p. 19) |
| Stem cutting | 10–15 cm, at least 2–3 nodes, 45-degree slant cut at the base (NCERT, p. 20) |
| Rooting time | 30–45 days (NCERT, p. 20) |
| Nursery bag | 5 by 4 inches; 2–3 drainage holes; soil:compost mix 2:1 (NCERT, pp. 19–20) |
The order and the tools, in one line:
- 7 activities in order: visit, plan, prepare land and shade-net, germinate seeds, raise plants, watch and record growth, calculate cost.
- 3 propagation methods: sowing on raised beds, sowing in plug or seedling trays, and stem cuttings.
- 1 formula: germination percentage.
- 3 record tables: Table 1.1 (plan), Table 1.2 (growth), Table 1.3 (cost).
Related resources
This listing is maintained for the 2026-27 academic session using the NCERT textbook information available to us. NCERT remains the authority for confirming the latest edition.
When you finish Chapter 1, these pages come next:
- Class 7 Kaushal Bodh book page — the chapters of the whole vocational education textbook.
- Class 7 NCERT books hub — every Class 7 textbook with its chapter listings.
- Class 7 notes, the vocational education notes index and the main notes home — revision support across subjects.
- Project 2 (School Habitat Garden) notes — the second sample project this chapter introduces on page 1.
Chapter 1 is the first project in the book, so there is no earlier chapter to link here.
Sources and data verification
The page references and figures on this page describe the NCERT textbook Kaushal Bodh (Vocational Education) for Class 7, Chapter 1, “Work with Life Forms” — the official edition published on ncert.nic.in.
This page covers Chapter 1 of that book only, not the whole textbook.
This listing is maintained for the current academic session using the NCERT information available to us.
NCERT settles textbooks, editions and official PDFs; CBSE settles the curriculum and examinations. Textbook contents and the examinable syllabus are not always identical, so check the current official syllabus.
Reference: NCERT Class 7 Vocational Education textbook, chapter 1, official edition on ncert.nic.in.
FAQs
1. What is the germination percentage formula in Class 7 Kaushal Bodh Chapter 1?
Germination percentage divides the number of seeds germinated by the total number of seeds placed or sown, then multiplies by 100 (NCERT, p. 15):
\[ \text{Germination percentage} = \frac{\text{Number of seeds germinated}}{\text{Total number of seeds placed / sown}} \times 100 \]
If 83 of 100 seeds sprout, the germination percentage is 83%.
2. How much space and sunlight does a school plant nursery need?
At least 2–3 hours of sunlight a day and about 150–200 square feet of area (NCERT, pp. 11–12). The spot should avoid waterlogging. If no plot is free, use unused space, a pathway, a parking lot, or plant in pots (NCERT, p. 12).
3. How do you grow a new plant from a stem cutting?
Make 2–3 drainage holes in a nursery bag (5 by 4 inches) and fill it with 2 parts soil and 1 part compost. Then cut a 10–15 cm stem from a mature, healthy parent plant.
Make a 45-degree slant cut at the base, keep at least 2–3 nodes, dip the cut end in rooting hormone powder or gel, and roots form in 30–45 days. Shift the new plant to a bigger polybag or the field (NCERT, pp. 19–20).
4. What is cocopeat and why do seedling trays use it?
Cocopeat is a growing medium used in seedling trays. One kilogram absorbs 5–8 litres of water. Trays use it because it manages moisture around roots better than plain soil, helps avoid disease spread, and provides nutrients for growth (NCERT, pp. 18–19).
5. Why does the chapter say to sow more seeds than the number of plants you want?
Because not every seed germinates. The germination rate tells you the likely share, so sowing extra ensures you still get the plants you need. The book states it directly: the number of seeds you use must be greater than the number of plants you wish to grow (NCERT, p. 16).
6. Which jobs are connected to the Plant Nursery project?
The chapter names gardener, botanist, forest officer, farmer and agriculture scientist (NCERT, p. 24). The book asks you to look around, speak to people, and identify more jobs related to the work you did.
Explore Class 7 Vocational Education Books
Related chapters: