
Work with Machines and Materials Class 7 is Chapter 3 of the NCERT Kaushal Bodh (Vocational Education) textbook for Grade 7, running 34 printed pages from page 49 to page 82 of the book. The chapter is one hands-on project — Tie and Dye — in which you prepare natural dyes from plants and create patterns on recycled fabric.
The official NCERT PDF is right below: the same file as the printed textbook, hosted on ncert.nic.in.
Open the official chapter here: Work with Machines and Materials Class 7 PDF. This is the NCERT edition hosted on ncert.nic.in, identical to the printed textbook, so the page numbers cited below will match the book in your hand.
The chapter at a glance
This is a project-based vocational chapter, not a theory chapter. The unit offers two example projects — Tie and Dye and AI Assistant — and the book says you must take up only one (NCERT, p. 49). You may also design a project of your own with your teacher’s help.
The Tie and Dye project runs as a sequence of five activities with observation tables, a swatch file, a final product and a closing reflection. Most pages are steps and record tables rather than reading text. The counts table on this page shows the chapter’s sections, figures and questions at a glance.
Inside Work with Machines and Materials Class 7: the Tie and Dye project
This chapter teaches one complete craft project: from observing how fabrics are sold, to tying, dyeing and finishing a product you can use.
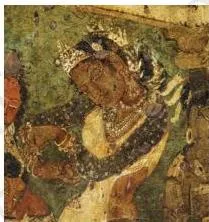
Before the activities, the book places the art in context — Bandhani from Rajasthan and Gujarat, Madurai Sungudi from Tamil Nadu, and batik from Madhya Pradesh, West Bengal and Rajasthan, with the earliest Bandhani evidence found in the Ajanta caves (NCERT, pp. 52–53).
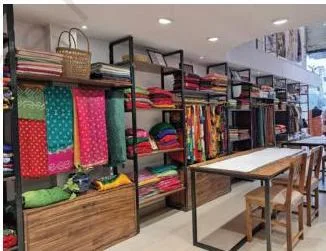
- Activity 1 — Visit to a shop: study fabrics, techniques and prices, and fill Table 3.1 for at least five fabrics (pages 57–58).
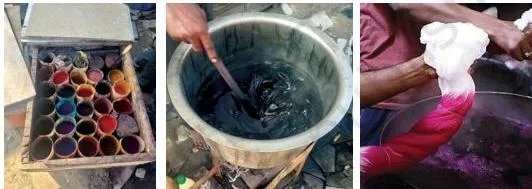
- Activity 2 — Workshop visit: watch artisans work, ask your questions, and study the process chart (pages 59–61, Figure 3.9).
- Activity 3 — Explore tie and dye: practise on five 6-by-6-inch samples, tying and dyeing one at a time (pages 62–73).
- Activity 4 — Final product: make a dupatta, scarf, pillow cover or dress material from recycled cloth (pages 75–78).
- Activity 5 — What did you invest? cost your materials and time (pages 78–80).
- Closing reflection: “What did I learn from others?” plus the Think and Answer questions (pages 80–82).
The core idea: resist dyeing and how patterns appear
Every pattern in this chapter comes from one trick: stopping the dye from reaching parts of the fabric. In a resist dye technique, sections of fabric are tied, folded, stitched or bound so they keep their original colour, and the contrast between dyed and undyed areas is the pattern.
Bandhani comes from a word meaning “to bind or tie” (NCERT, p. 51).
A useful analogy: masking tape on a wall stops paint from reaching the surface underneath. Remove the tape and the unpainted shape is your design. Tie and dye works the same way — the thread is the tape, the dye is the paint, and the tied part of the fabric becomes the pattern.
Why is every piece unique? Because the tying is done by hand, and no two artisans tie the same way — the book says no two tied pieces turn out identical (NCERT, p. 53).
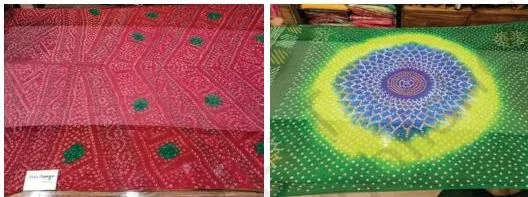
Figure 3.2 shows finished Bandhani cloth. Look at how small repeated dots and spirals build into an overall design — that is the intricate effect the tied points create when they sit close together.

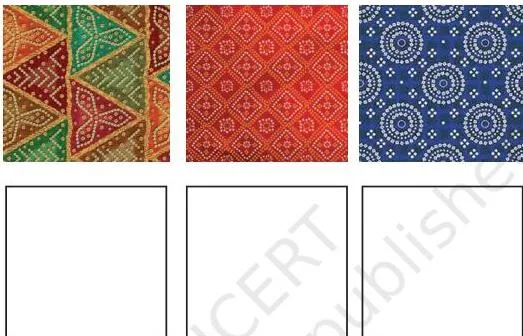
Figure 3.6 gives different Bandhani samples to study. The book asks you to observe the repeated motifs and draw them — repetition of a small unit across the fabric is what makes a Bandhani design read as one pattern.
Bandhani, Shibori and Leheriya: three ways to tie fabric
The tying step decides the design. The same dye on the same fabric gives completely different results depending on how you tie it first.
| Technique | How you tie it | Pattern it creates | What you can vary |
|---|---|---|---|
| Bandhani | Pinch a small point of fabric and knot it tightly with thread; grains or seeds inside make the tied point bigger | Dots and circles; larger designs repeat these motifs | Size of the pinched point, number of knots, spacing |
| Shibori | Sew running stitches along the drawn design, pull the thread to gather the fabric, then knot | Folded shapes and sharp lines along the stitched design | Stitch length, angle of the lines, how tightly you gather |
| Leheriya | Fold the fabric in half, make accordion pleats, tie tightly at the centre and at equal intervals | Wave-like lines running across the fabric | Number of pleats and the spacing of the ties |
Practical rule from the book: tie one sample at a time so you improve as you go, and try more than one technique (NCERT, p. 66).
Bandhani: knots that make dots and circles
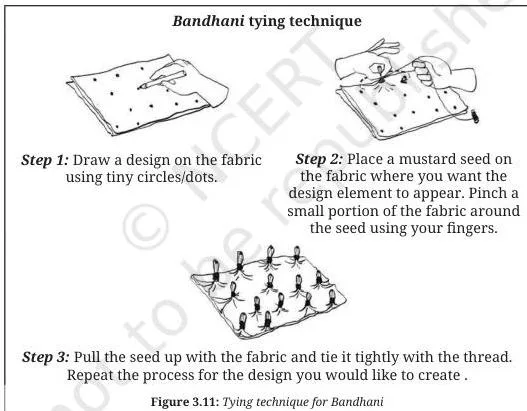
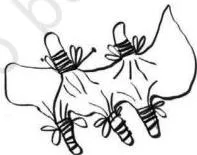
Pinch the fabric at a point, wrap thread around the pinched neck and knot it. The knot blocks the dye, so each knot leaves a dot or circle of the fabric’s original colour.
Traditional Bandhani patterns are named by how many knots sit together (Table 3.3, NCERT, p. 64):
- Ekdali — single dot
- Trikunti — groups of three
- Chaubandi or Chaubasi — groups of four
- Satbandi — groups of seven
Larger designs are built by repeating these named motifs.
Shibori: stitches that gather the fabric
Shibori is an ancient Japanese technique; the name means to wring, squeeze or press (NCERT, p. 56). Instead of pinching, you sew the design first.
- Draw the design on the fabric, in straight or dotted lines.
- Sew simple running stitches along the lines, keeping even spacing for a neat pattern.
- Outline the whole pattern with loose stitches, since they will be gathered later.
- Pull the loose ends of the thread to gather the fabric into folds — the tighter you pull, the more distinct the design.
- Knot firmly so the dye cannot seep into the folded areas.
Traditional Shibori often used natural indigo dye, which changes from green to blue as the fabric reacts with air while drying (NCERT, p. 56). That reaction is part of what makes the finished pattern.
Leheriya: pleats that make waves
Leheriya takes its name from leher, meaning “wave” — the pattern represents flowing water, which has high significance in Rajasthan and Gujarat (NCERT, p. 56).
- Fold the fabric in half and find the centre point.
- Make small, even pleats by folding the fabric back and forth like an accordion.
- Continue until the whole fabric is pleated, holding the folds firmly.
- Hold the pleats and tie them tightly with thread at the centre.
- Tie again at equal intervals on both sides of the centre.

The wave appears where the ties block the dye. Fewer or more pleats, and the spacing of the ties, change the size of the wave.
Natural dyes and fixers: what gives the colour, what keeps it
A natural dye is only useful if the colour stays on the fabric — and that is the fixer’s job. Fixers such as salt, vinegar or baking powder stop the colour from washing out, fading too soon, or bleeding onto other clothes (NCERT, p. 54).
Why heat? Heating increases the dye’s solubility in water, speeds up the dyeing process and helps fix the dye to the fabric (NCERT, p. 70). The two worked recipes below are simmered; the no-heat methods come after them.
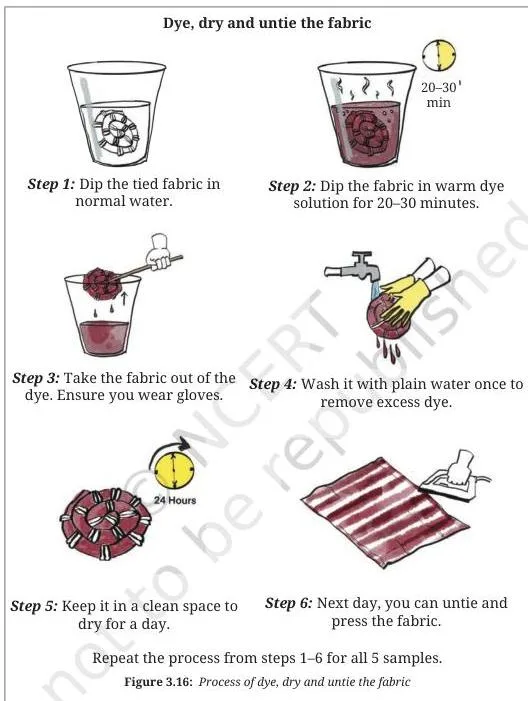
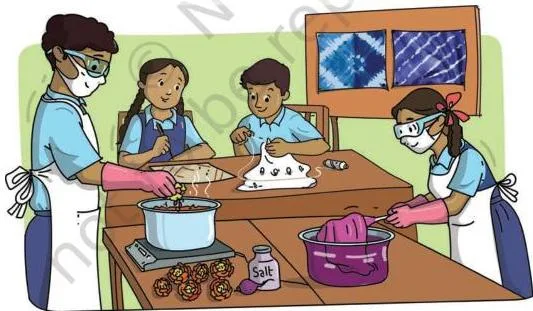
Figure 3.16 shows the actual dyeing step: the tied fabric goes into the prepared dye, and only the tied parts keep their original colour.
Safety first (NCERT, p. 55). Before any dyeing, gather what keeps you and others safe:
- gloves to protect hands from warm dyes, and an apron to protect clothes
- a mask so splashes and vapour from hot dye do not reach your mouth
- goggles to keep hot water out of your eyes
- a well-ventilated room so smells and vapours do not irritate you
- careful handling of scissors — never point them at yourself or anyone else
- plastic sheets spread on the work surface, and leftover dye disposed of in the sink
Pink and red dye from beetroot
Two medium beetroots give a pink-red dye, and salt sets it (NCERT, p. 69).
- Chop or crush two medium beetroots — crushing releases the colour.
- Add them to 1 L of water and let it boil slowly for about an hour.
- Cool the mixture, then strain it through a cotton cloth or strainer.
- Add one to two tablespoons of salt as the fixer.

Scale the recipe to your fabric: the darker the shade you want and the heavier the fabric, the more plant material and water you need.
Yellow dye from turmeric
Turmeric is the easiest dye to source — it is already in most kitchens (NCERT, p. 70).
- Measure 2 tablespoons of turmeric powder into a bowl.
- Dissolve it in half a glass of cold water.
- Simmer 1 L of water in a large container.
- Add the turmeric mixture and let it simmer for about an hour.
- Add 1–2 tablespoons of salt, baking powder or vinegar as the fixer.

Other plant dyes and their fixers
Table 3.5 in the book lists five more plant dyes. The rule for each: about 100 g of plant material per litre of water, simmered to boiling point, strained, then fixed (NCERT, p. 71).
| Colour | Plant | Fixer to add |
|---|---|---|
| Blue | Blue hibiscus | 250 mL vinegar |
| Brown | Tea or coffee | 250 mL vinegar |
| Green | Spinach | 2 tablespoons salt |
| Yellow | Marigold | 250 mL vinegar |
| Red | Pomegranate | 2 tablespoons salt |
For the samples, the book also suggests turmeric or marigold for yellow, beetroot for pink, spinach for green, and blue hibiscus, blueberry or blue pea flower for blue (NCERT, p. 68).
Two ways to dye without a stove
For classrooms without a burner, the book gives two no-heat options (NCERT, p. 71):
- Passive heating: put the dye and fabric in a glass jar and leave it in a sunny spot. The sun slowly extracts the dye over several days to weeks — the darker the shade you want, the longer it takes.
- Cold water dyes: these use chemical fixers instead of heat. Soak the tied fabric in the dye, then in a fixer solution, then rinse.
Reading the diagrams: process chart, fabric prep and the swatch file
The chapter is easiest to follow through its figures — each one marks a stage of the project.
Figure 3.1 (p. 51) shows tie and dye as a group activity in the classroom. That is the setting the whole project is designed for.
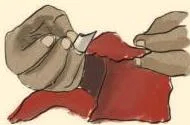
Figure 3.5 (p. 55) shows the nakhli or nakhlo, a metal ring with a blunt protruding edge. Artisans use it to pick up the fabric while tying, so the knots are easier to make and the fingers stay away from the dye.

Figure 3.9 (p. 61) is the spine of the project: an eight-step process chart from selecting the fabric to untying the finished design. Each later section of the chapter expands one step of it.
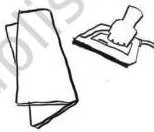
Figure 3.10 (p. 62) shows how to prepare sample fabric: cut the cloth, wash it to remove starch and dirt, dry it, and iron it to remove creases. Fabric that skips this step dyes unevenly.
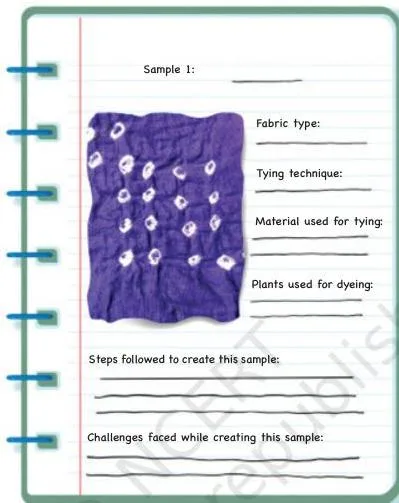
Figure 3.17 (p. 75) is a sample swatch file — your five samples mounted with notes: fabric type, tying technique, dye used, challenges faced and the step-by-step process. This is how you present your practice work.
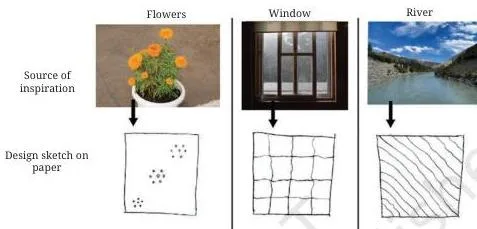
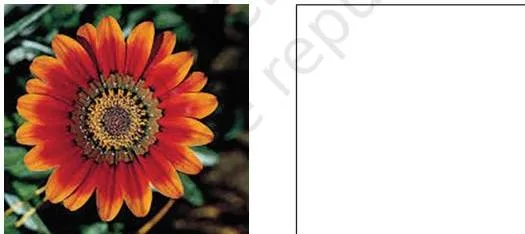
Figures 3.19 and 3.20 (p. 77) show design inspiration. Figure 3.19 starts from everyday objects; Figure 3.20 asks you to draw a design inspired by a flower. The drawn motif becomes the tied pattern on your product.
Key terms in this chapter, explained
This chapter uses several craft terms without repeating their meanings. Keep this table handy while you work.
| Term | What it means | NCERT page |
|---|---|---|
| Resist dye technique | Stopping dye from colouring some parts of the fabric so they keep their original colour; the contrast makes the pattern | p. 51 |
| Bandhani | “To bind or tie” — knotting points of fabric so they resist dye; practised mainly in Rajasthan and Gujarat | p. 51 |
| Madurai Sungudi | Cotton tie and dye material from Madurai, Tamil Nadu, introduced by migrants from Gujarat | p. 52 |
| Batik | Wax-resist dyeing done with blocks or stencils; practised in Madhya Pradesh, West Bengal and Rajasthan | p. 52 |
| Leheriya | From “leher” (wave) — accordion pleats tied at intervals create a wave pattern | p. 56 |
| Shibori | Japanese technique meaning “wring, squeeze or press” — stitched fabric is gathered before dyeing | p. 56 |
| Nakhli / nakhlo | Metal ring with a blunt edge used by artisans to pick up fabric for tying | p. 55 |
| Fixer | Salt, vinegar or baking powder that keeps the dye from washing out, fading or bleeding | p. 54 |
| Natural dye | Colour made from plants such as beetroot, turmeric and spinach; more environment friendly than chemical dyes | p. 68 |
| Passive heating | Using sunlight in a glass jar to extract dye slowly over days to weeks | p. 71 |
| Cold water dye | Dye that uses chemical fixers instead of heat | p. 71 |
| Swatch file | A display of your samples with notes on fabric, technique, dye, challenges and process | p. 74 |
| Reverse tie and dye | Removing colour with bleach or chemicals to make white patterns on a dark background | p. 79 |
| Ornamentation | Adding lace, buttons, tassels, embroidery or beadwork to decorate the finished product | p. 81 |
Mistakes that spoil a tie and dye project (and how to avoid them)
The dyeing step hides the fabric, so mistakes usually appear only at the end — by then one sample is lost. The book’s own challenge table (Table 3.7, p. 73) names the three big ones.
| Mistake | Correct rule | How to check your work |
|---|---|---|
| Thread broke or loosened during dyeing | Tie tightly and handle the fabric gently | Check every knot before dipping; retie any that feel loose |
| Dye solution spilled | Keep a clear workspace; hold hot containers with a cloth or gloves | Set materials away from the edge; work on plastic sheets |
| Fabric cut while untying | Never use scissors — find the thread with a needle and untie by hand | Inspect the sample before mounting it in the swatch file |
Four earlier warnings in the book matter just as much:
- Coloured tying thread can bleed its own colour into the fabric — thread must be white or very light (NCERT, p. 54).
- Starch or dirt on the fabric makes the dye take unevenly — wash the fabric first (NCERT, p. 54).
- Tying all five samples at once hides your mistakes — do one sample at a time so the later ones improve (NCERT, p. 66).
- Skipping the fixer lets the colour wash out or bleed onto other clothes (NCERT, p. 54).
What you need to finish and hand in
The chapter’s own yardstick: by the end you should be able to prepare natural dyes, design patterns, create colourful patterns on recycled fabrics and prepare a product (NCERT, p. 54). Because this is a project chapter with activities instead of a question set, “completing” it means doing the work and keeping the records.
- Five tied and dyed samples, with Table 3.4 filled in for each (pages 62–67).
- A swatch file carrying the fabric sample, type, technique, dye, challenges and process (pages 74–75).
- A final product — dupatta, scarf, pillow cover or dress material — made from recycled cloth (pages 75–78).
- The costing table for materials, writing ₹0 for anything recycled (pages 78–79).
- The time-tracking table for each activity (p. 80).
- Written answers to the closing Think and Answer questions (p. 82), including the journey of a tie and dye product from raw material to market and the jobs involved.
Worked example: how much does one scarf cost? Suppose you use an old cotton bedsheet for the fabric. Recycled bedsheet: ₹0. Two medium beetroots from the market: ₹30. Salt for the fixer: ₹5. Thread taken from an old spool: ₹0. Total: about ₹35 for the materials you bought.
Local market prices change the answer — the book asks for your numbers in Table 3.9, not a fixed figure. One honest note: textbook contents and the examinable syllabus are not always identical — check the current official syllabus for what is assessed this session.
The whole project in eight steps
This is the process chart from NCERT page 61 rebuilt in one glance — the same eight steps you follow for the samples and for the final product.
- Select the fabric.
- Wash the fabric.
- Choose the plant for natural dye.
- Tie the fabric.
- Prepare the dye and add the fixer.
- Dye the tied fabric.
- Dry the dyed fabric.
- Untie the fabric and see the design.
Mnemonic: “She Washes Cotton, Then Prepares Dye, Dries, Unties” — the first letters (S, W, C, T, P, D, D, U) match all eight steps in order. Cotton is your “plant” for step 3, since cotton is itself a plant.
Four decisions personalise the project:
- Which fabric? Natural fibre (cotton, silk, wool), light coloured, recycled if possible.
- Which technique? Bandhani, Shibori or Leheriya — try more than one.
- Which colour? Choose the dye plant for the shade you want.
- Which product? Dupatta, scarf, pillow cover or dress material.
Close by being able to answer the chapter’s reflection prompts (p. 82): what did you enjoy, what challenges did you face, what will you do differently next time, and which jobs sit behind a tie and dye product reaching the market — artisan, dyer, fashion designer, retailer, textile researcher.
Where to go next
- Class 7 Vocational Education (Kaushal Bodh) notes — the book page for the whole set of projects.
- Class 7 study hub — all subjects for this grade in one place.
- Project 2 — the chapter that comes before Tie and Dye in this book.
- Project 4 — the chapter that follows, the AI Assistant project.
- CBSE notes home — the full directory of study pages.
To re-check any detail against the official file, open the Work with Machines and Materials Class 7 chapter PDF on ncert.nic.in, or browse the NCERT website for the complete textbook.
Sources and data verification
This listing is maintained for the 2026-27 academic session using the NCERT textbook information available to us. NCERT remains the authority for confirming the latest edition.
This page describes NCERT Kaushal Bodh, Grade 7 (Vocational Education), Chapter 3, “Work with Machines and Materials”, official edition on ncert.nic.in.
It covers this one chapter of this book only — not other books, grades or subjects.
The page is maintained for the current academic session using the NCERT information available to us.
NCERT settles textbooks, editions and PDFs; CBSE settles curriculum, syllabus and examinations.
| What the chapter holds | Count | Where it is used |
|---|---|---|
| Printed pages | 34 | |
| Figures with NCERT captions | 49 | |
| Tables | 13 | |
| Official NCERT PDF | Download the chapter PDF | the chapter exactly as NCERT publishes it |





Reference: NCERT Class 7 Kaushal Bodh textbook, chapter 3, official edition on ncert.nic.in.
Frequently asked questions about the Work with Machines and Materials chapter
What is the difference between Bandhani, Leheriya and Shibori?
The difference is the tying method. Bandhani pinches and knots small points of fabric to make dots and circles; Leheriya pleats the fabric like an accordion and ties the pleats at intervals to make waves; Shibori sews running stitches along a design and pulls them tight so the fabric gathers into folds (NCERT, pp. 56, 63–66).
Which plants can I use to make natural dye for the Class 7 tie and dye project?
Blue from blue hibiscus, brown from tea or coffee, green from spinach, yellow from marigold and red from pomegranate — each with about 100 g of plant material per litre of water — plus turmeric for yellow and beetroot for pink-red (NCERT, pp. 68–71). Add the fixer shown in the dye colour chart above: vinegar for the first four, salt for spinach and pomegranate.
Why does the book tell me to use white or very light thread for tying fabric in tie and dye?
So the thread’s own colour cannot bleed onto the fabric while it sits in hot dye. A coloured thread can leave its dye on the cloth where it is tied, and that mark would spoil the pattern (NCERT, p. 54).
How much time does the whole tie and dye project take?
Plan for a few hours of active work spread over several days.
The book asks you to record your own time per activity on the timeline and gives no fixed minutes, but the steps force a pace: each dye needs about an hour of simmering, the final product dries for about a day (p. 78), and the passive heating method takes days to weeks (p. 71).
What do I need to submit after finishing Chapter 3 of Kaushal Bodh?
Five tied and dyed samples with Table 3.4 filled in, a swatch file, the final product, the costing table, the time-tracking table and written answers to the closing Think and Answer questions (pages 62–82).
Where can I download the official Class 7 Work with Machines and Materials chapter PDF?
The official PDF is on ncert.nic.in — open the Work with Machines and Materials Class 7 PDF and it will take you straight to Chapter 3 of Kaushal Bodh Grade 7, identical to the printed textbook.
Explore Class 7 Vocational Education Books
Related chapters: