
The official Work with Machines and Materials Class 8 chapter PDF — Chapter 3 of the NCERT Kaushal Bodh (Vocational Education) textbook — is on this page. It is a hands-on project chapter about making useful things from wood and bamboo, published for the 2026-27 session.
Use the download link below to open the official file, then read on for a plain-language walkthrough of the same pages — materials, tools, safety, joints, the making steps and the records you have to fill in.
Download the Work with Machines and Materials Class 8 chapter PDF
The chapter is part of the Kaushal Bodh Grade 8 skills book. It carries one full project — working with wood and bamboo — from the workshop visit to the finished, priced product.
Download the official Work with Machines and Materials Class 8 chapter PDF from the NCERT website so you can read and print the exact textbook pages, and keep it open while you work.
| What the chapter holds | Count | Where it is used |
|---|---|---|
| Printed pages | 24 | |
| Figures with NCERT captions | 38 | |
| Tables | 5 | |
| Official NCERT PDF | Download the chapter PDF | the chapter exactly as NCERT publishes it |




Reference: NCERT Class 8 Kaushal Bodh textbook, chapter 3, official edition on ncert.nic.in.
Chapter at a glance: what is inside the PDF
The table on this page shows the chapter’s size at a glance — how many sections, figures and tables it holds.
This is an activity-led project chapter, not an exercise chapter. It walks you through a workshop visit, a prototype, building with wood, working with bamboo, costing the product and carrying out repairs — with record tables and reflection questions at every stage. It contains no formulas and no numerical exercises.
What this chapter is about: the wood and bamboo project
Before any making starts, the chapter explains why wood and bamboo matter and what the project expects of you. Read this part even if you want to start building — it decides how you choose materials and what you record.
The chapter opens with two sample projects: Working with Wood and Bamboo and Home Automation. The book says clearly that you must take up only ONE project — either choose one of these two, or design your own with your teacher’s help. Everything on this page follows the wood and bamboo project.
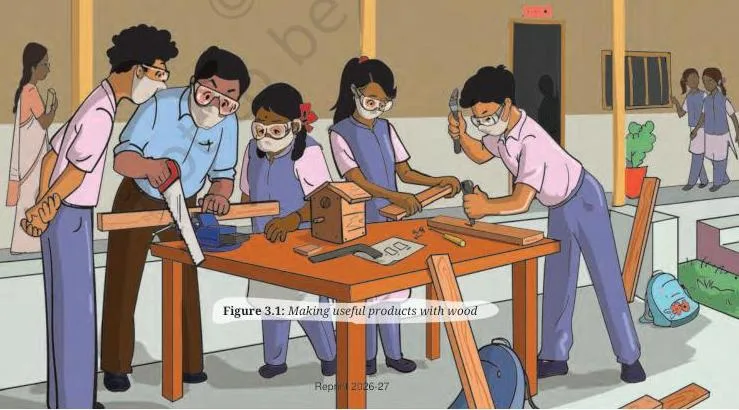
Figure 3.1 shows why the book calls wood and bamboo indispensable. Doors, fruit and vegetable carts, school benches, cricket bats, baskets, jewellery, toys, kitchen-tool handles, bookshelves and even fishermen’s boats and oars are all made from them (NCERT p. 61).
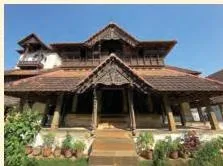
India’s old buildings show how long wood lasts. The chapter highlights the Padmanabhapuram Palace in Tamil Nadu — one of Asia’s largest wooden palaces, built about 400 years ago and spread over 6.5 acres. It also names the Hidimba Temple in Manali, the Rumtek Monastery in Sikkim and Vishrambaagh Wada in Pune for their decorative woodwork (NCERT p. 62).
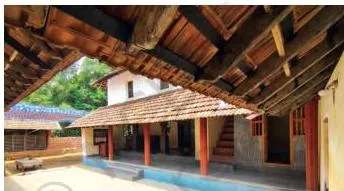
Figure 3.3 shows why wood is still chosen for building today. Wood keeps rooms cooler in summer and warmer in winter, and it stays strong enough for bridges, playground equipment and cricket, badminton and hockey gear (NCERT p. 63).
There is a responsible-use message in this section. Wood is a renewable resource because new trees can replace cut ones — but only if planting keeps up with use.
Trees at high altitudes in the Himalayas barely regrow, so the book advises using wood judiciously and, ideally, only after a tree has completed its natural lifecycle. Our tradition agrees: a prayer from the Atharva Veda asks the earth that whatever we dig from it may “have quick regeneration” (NCERT p. 63).
Key concepts: materials, tools, joints and the making sequence
The project activities are built on four sets of ideas: what the materials are like, how to stay safe, how parts are joined, and the order of making. These subsections cover each one so the activities make sense before you start.
Wood and bamboo: choosing your material
This is the first time many students cut real material, so the chapter starts with what the material itself feels like. Natural wood is divided into hardwood and softwood, depending on the kind of tree.
- Hardwood — from trees like babool, mango, jackfruit and teak. Babool and mango are used for construction (houses, bridges, window frames, flooring); jackfruit for furniture and small objects like pooja stands; teak for ships and outdoor furniture. Hardwood is hard to cut and needs stronger tools (NCERT p. 65).
- Softwood — from trees like pine, deodar and eucalyptus. Pine and deodar make lightweight furniture, shelves and packing boxes; eucalyptus is used for paper. Softwood cuts, shapes and finishes easily, which is why it suits beginners (NCERT p. 65).
- Fingernail test — press your thumbnail against the wood and pull it along. A scratch means softwood; no scratch means hardwood (NCERT p. 65).
- Engineered wood — plywood and Medium Density Fibreboard (MDF), usually made from recycled wood, sawdust, tiny wood particles and wood fibre. Sawdust is the fine dust produced when wood is processed into objects (NCERT p. 63).
- Bamboo — a perennial grass, not a tree, so it grows back when cut (NCERT p. 63).
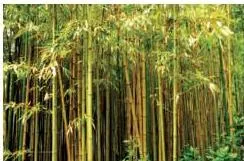
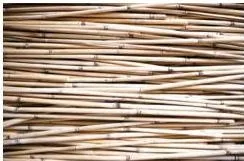
Figure 3.4 explains why bamboo is a cheap, local material: it grows in almost all parts of India, with the most in the north-east, and is missing only in the extremely hot desert of Rajasthan and the extremely cold desert of Ladakh (NCERT p. 64).
The table below compares the four options a first-time maker meets:
| Material | What it is | Easy for a beginner? | Best projects |
|---|---|---|---|
| Hardwood | wood from babool, mango, jackfruit or teak trees | No — needs stronger tools and specific techniques | construction, flooring, furniture, ships |
| Softwood | wood from pine, deodar or eucalyptus trees | Yes — easy to cut, shape and finish | lightweight furniture, shelves, packing boxes |
| Plywood | engineered wood from recycled wood, sawdust and wood fibre | Yes — a good choice for a first product | coasters, phone stands, nameplates, small toys |
| Bamboo | a perennial grass that regrows when cut | Yes — easy to work with | handicrafts, bamboo utensils, flutes, ektara |
Tools, materials and safety before you start
Nothing can be made safely until you know the tools and the safety rules — so the book lists both before the first activity.
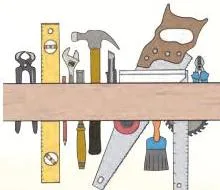
Figure 3.5 shows the woodworking tools the project needs: tri-square, hand saw, wood file, plane, claw hammer, measuring tape, steel ruler, bench vice, brush, clamps, hand drill and cutter.
Several return later with their jobs — the plane shaves strips off wood, the hacksaw cuts it, the bench vice holds it steady, and the hand drill makes holes for screws and nails (NCERT p. 64).
The materials list sits with the tools: nails, screws, pencil or chalk, wood glue, sandpaper, varnish, softwood and/or bamboo, cardboard, synthetic resin adhesive and cellophane tape. The photo above shows the materials laid out together — glue, tape and nails join parts, while sandpaper and varnish finish the surface (NCERT p. 65).
Safety comes before skill. The book’s rules are:
- Handling tools — use every cutting tool carefully, learn the proper way to hold it, and wear a mask and safety goggles to protect your eyes from wood dust (NCERT p. 64).
- Workplace safety — keep the workspace organised and free of dust and wood cuttings, and put tools back in their proper place after use (NCERT p. 64).
- Internet safety — ask your teacher before using the internet, do not upload or download anything without checking, and never share personal information (NCERT p. 64).
Adult supervision is required throughout, and the book suggests working with a carpentry instructor or a local carpenter to learn proper tool handling and safety (NCERT p. 63).
How wooden parts are joined: joints, fasteners and hinges
Look at any wooden object and you will see several parts joined together — the joint is what makes it usable. That is why the chapter teaches the main joints before any making.
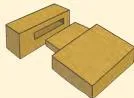
Figure 3.6 shows the four common joints used in wooden products. The book describes each one by what it is, when to use it, and what it is for (NCERT p. 68).
| Joint | How the parts meet | Use it when | Typical use |
|---|---|---|---|
| Butt joint | straight edges join at the corners | simple connections where strength is not a major concern | small tables, picture frames |
| Mitre joint | pieces come together at a 45 degree angle | simple connections where strength is not a major concern | picture frames, small tables |
| Lap joint | one piece overlaps and sits on top of the other | when extra surface contact is needed for strength | shelves, simple boxes, frames needing durability |
| Mortise and tenon | a tenon on one piece fits into a mortise slot on the other | strong, durable connections that support heavy loads | doors, windows, chairs, tables, bookshelves, timber frames |
There are other ways to join parts too — nails, screws, wood glue and bamboo string (twine).
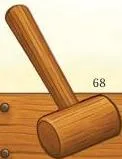
Nails, screws, nuts and bolts are called fasteners: nails are fixed with a hammer, screws with a screwdriver after a small dent is made for the screw tip, and nuts and bolts are fastened through a hole drilled with a hand or power drill (NCERT p. 69).
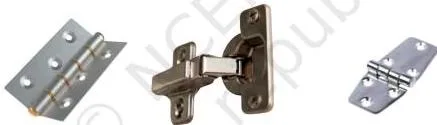
Figure 3.7 covers moving parts. Doors, windows, cupboards, chests and lids must open and close — hinges join these moving parts and keep the object durable, and different hinges suit different uses (NCERT p. 69).
Why you make a prototype before the real product
The chapter wants you to test your design cheaply before cutting real wood. A prototype is the first model of a product, made to check the design.
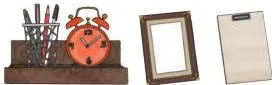
Figure 3.8 shows the kind of simple objects suitable for a first prototype — the book suggests picking one like these. For the first attempt, use cardboard or waste softwood for a small model, and use the material wisely with minimum wastage (NCERT p. 70).
Making the prototype takes three steps (NCERT p. 71):
- Sketch the object in three dimensions, with its dimensions marked.
- Collect cardboard or waste softwood, a cutter, pencil and scale. Mark the design carefully on the material so it matches the sketch, then cut it as per the dimensions.
- Assemble the model with glue, and check whether it has come out as per the original design.
Prototyping has three advantages the book lists. It shows whether a design that looks good on paper is actually possible in three dimensions; it reduces the chances of error in the real object; and it is cheap to modify, because cardboard or waste wood costs little (NCERT p. 71).
For moving parts you can even model a hinge by piercing pieces of old wire into cardboard — that trick is shown in Figure 3.10 below.
The eight woodworking skills, in the order the chapter teaches them
Once the design is prototyped, real making follows a fixed order of skills. The book calls these the basic skills for working with wood, and you practise them in this order (NCERT p. 74).
- Sketching and planning — draw a simple outline of the object and collect the required materials and tools.
- Measuring and marking — use a measuring tape and pencil to mark exactly where to cut.
- Planing — the plane shaves thin, uneven strips off the wood surface, removing high spots and rough edges.
- Drilling — a hand drill makes holes for screws or nails; keep the drill perpendicular to the wood.
- Cutting — use a hacksaw. Secure the piece tightly in the bench vice, mark the cut line, make a small starter cut, check it is straight and correct it if needed.
- Sanding — sandpaper smoothens the surface and edges for a polished finish.
- Assembly — join the parts as per the sketch, using press-fit joints, nails, screws, or nuts and bolts.
- Varnishing or painting — varnish, a solution of resins, oil and solvents, forms a protective layer that resists scratches and improves appearance and durability.
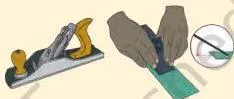
Planing is the skill students usually meet first, because the plane is a tool many have not seen. The photo above shows how it slides along the wood, shaving off a thin strip and levelling the surface (NCERT p. 74).
See how one small object — say, a nameplate — passes through all eight skills. Sketch it with its length and width; measure the wood and mark the outline; plane the face smooth; drill holes for any screws; cut the marked outline with a hacksaw; sand the edges; assemble the parts; then varnish and let it dry.
The book’s list of good first products is a coaster, wall hanging, key chain, chalk duster for the classroom, phone stand, nameplate or a small wooden toy, starting with softwood or plywood scraps (NCERT p. 72).
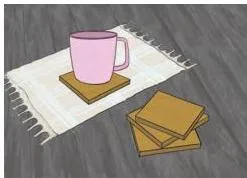
Figure 3.11 shows the wooden coaster — a small flat piece of wood that protects a table from hot cups or glasses — the simplest first product to try.
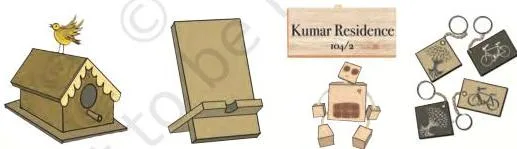
Figure 3.14 gives more ideas: a bird house, mobile phone holder, nameplate, wooden toy and keychains (NCERT p. 76).
Working with bamboo: its structure and its making steps
Bamboo is a grass, not a tree, so it has its own anatomy and its own way of being cut. The chapter gives bamboo a separate activity with its own steps.
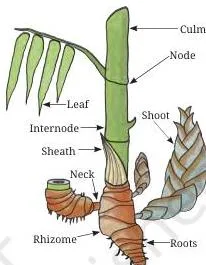
Figure 3.15 shows the structure of bamboo. The culm is the stem — a hollow cylinder that tapers towards the top and is the part most used for products (NCERT p. 77).
A bamboo plant has many culms. Each stem is covered with a sheath, whose leaf-like structures protect the developing plant, and is divided by solid nodes, with internodes between them. Culms with a smooth texture are used for handicrafts and bamboo utensils (NCERT p. 77).

Figure 3.16 shows finished objects made from bamboo — what the culm becomes after cutting, smoothing and assembly.
The bamboo making sequence runs: sketch and plan with labelled measurements (width, height, thickness); measure and mark; cut the internodes with a hacksaw and bench vice; smooth by scraping off the outer skin; assemble with a hand drill, nails or nuts and bolts; sand; then varnish or paint (NCERT p. 78).
Two differences stand out against the wood sequence: you cut at the internodes, and scraping replaces planing.
Pricing your product and carrying out repairs
Making an object is only half the project. The chapter also asks what it costs to make, and how to keep wooden things working.
For costing, list every material with its quantity and cost in a table like Table 3.3 — wood or bamboo, nails, paint or varnish, sandpaper and other materials — and total them. Then estimate the labour hours you spent, because that is part of the cost. Finally, find the market price of a similar product and compare it with your total (NCERT p. 79).
Costing worked example (fresh numbers, not from the book) — one wooden coaster:
| Costing entry | Amount (₹) |
|---|---|
| Scrap wood | 20 |
| Nails | 5 |
| Sandpaper | 10 |
| Varnish | 15 |
| Materials total | 50 |
| Labour — 3 hours at ₹30 per hour | 90 |
| Total cost | 140 |
| Similar coaster in the market | about 180 |
Here the total cost is ₹140: ₹50 of materials plus ₹90 of labour. If a similar coaster sells in the market for about ₹180, the maker has room to price the product fairly — which is exactly why the chapter wants the costing in writing.
Wooden objects need maintenance like anything else: tightening nuts, nailing loose parts, painting, and sanding worn-out parts. If objects are not maintained in time, their life gets reduced (NCERT p. 80).
Table 3.4 in the book gives one completed example — a school bench top fixed by tightening its screws, with the edges still to be sanded — and leaves blank rows for your own repair of a bench, cupboard or desk at school or home (NCERT p. 80).
Reading the process figures step by step
The chapter’s drawings are instructions, not decoration. This section reads each how-to figure in the order it appears, so you can copy the steps while you work.
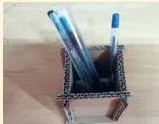
Figure 3.9, Basic steps for making a prototype of an object, is read from top to bottom. Step 1 — sketch the object in 3D with its dimensions. Step 2 — collect cardboard or waste softwood, a cutter, pencil and scale, mark the design on the material, and cut it. Step 3 — assemble with glue and compare the model with your original sketch (NCERT p. 71).
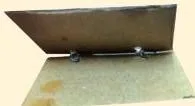
Figure 3.10 shows a prototype of a hinge. Pierce pieces of old wire into cardboard — the wire acts as the pin, and the cardboard flaps open and close like a real hinge. This is how you test a moving part cheaply before buying a metal hinge (NCERT p. 71).
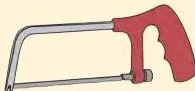
The cutting figure makes one rule visible: cut only after the wood is secured tightly in the bench vice, with a straight line marked. Begin with a small cut at the start of the line, check that it stays straight, and correct it before sawing on (NCERT p. 74).
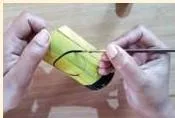
Figure 3.17, Steps for making products from bamboo, is the bamboo version of the same sequence: sketch, measure and mark, cut the internodes with a hacksaw, smooth by scraping, assemble, sand, and varnish or paint (NCERT p. 78).
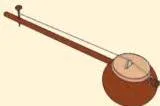
Figure 3.18 shows the chapter’s extension idea — an ektara, a simple one-stringed musical instrument used widely across India. It is easy to make from bamboo, a coconut shell or a hollow cylinder, and it points you towards your own product ideas (NCERT p. 82).
Key terms from the chapter, explained simply
These are the words that keep appearing in the project instructions. Learn them once and every activity reads faster.
| Term | Plain meaning | NCERT page |
|---|---|---|
| Hardwood | wood from trees like babool, mango and teak; dense and hard to cut | p. 65 |
| Softwood | wood from trees like pine and deodar; easier to cut and finish | p. 65 |
| Engineered wood | wood product made from recycled wood, sawdust and wood fibre, e.g. plywood and MDF | p. 63 |
| Sawdust | the fine dust produced when wood is processed | p. 63 |
| Renewable resource | a material that can be replaced by new growth, like trees planted to replace cut ones | p. 63 |
| Prototype | the first small model of a product, made to check the design before building the real thing | p. 70 |
| Fastener | a part used to join things — nails, screws, nuts and bolts | p. 69 |
| Hinge | a fitting that joins moving parts like doors and lids so they open and close | p. 69 |
| Varnish | a solution of resins, oil and solvents that protects wood and improves its look | p. 74 |
| Plane | a tool that shaves thin strips off wood to make it smooth | p. 74 |
| Sanding | smoothing a surface or edges with sandpaper for a polished finish | p. 74 |
| Bench vice | a clamp that holds the wood piece tightly while you cut or drill | p. 74 |
| Culm | the hollow, tapering stem of bamboo — the part used for making products | p. 77 |
| Node | a solid joint on the bamboo stem that divides it into segments | p. 77 |
| Internode | the hollow section of bamboo between two nodes | p. 77 |
Common mistakes in the wood and bamboo project, and how to avoid them
Most of these activities go wrong in the same few ways. The book’s instructions exist to stop exactly these errors — read each one before you start.
| Mistake | What the book says instead | Page |
|---|---|---|
| Choosing hardwood for the first product | Choose softwood or plywood for the first product — hardwood needs stronger tools | p. 65 |
| Cutting before marking the line and checking it | Mark the cut line first; make a small starter cut, check it is straight and correct it | p. 74 |
| Cutting a loose piece of wood | Secure the piece tightly in the bench vice before cutting | p. 74 |
| Drilling at an angle | Keep the drill perpendicular to the wood where the hole goes | p. 74 |
| Skipping the prototype | Make a cardboard prototype first — it catches design errors cheaply | p. 70 |
| Working without a mask and goggles | Wear a mask and safety goggles — wood dust can injure the eyes | p. 64 |
| Rushing the costing and leaving out labour | Record every material with its cost, then add your labour hours | p. 79 |
| Letting the workspace pile up with cuttings | Keep the workspace organised and clean; return tools after use | p. 64 |
The outcomes this chapter checks, and the records it asks for
This chapter does not end with exercise questions. It ends with a product and a set of records, and the chapter’s own checklist tells you what counts as success.
Four outcomes define what you will be able to do at the end of the project (NCERT p. 64). Check each one before you call the work finished:
- Safely use tools like a hammer and saw — to cut, join and assemble materials.
- Design a product and make a prototype.
- Build a functional object using basic carpentry hand tools and materials.
- Apply finishing techniques to make the object durable and attractive.
The written records the chapter asks for are Table 3.1, the observation record of the carpenter’s workshop visit (p. 66); Table 3.2, your analysis of the chosen object with a labelled sketch of its parts and joints (p. 69); Table 3.3, the cost estimate (p. 79); and Table 3.4, the repair record (p. 80).
You also submit the activity timeline — the approximate hours or periods each activity took — and reflection answers: what did I learn from others, what did I do and how long did it take, and what else can I do (pp. 81-82).
Two honest notes. The book says only ONE of the two sample projects — Working with Wood and Bamboo or Home Automation — needs to be taken up, so check with your teacher which project your school expects; the alternative is covered on the Home Automation project page.
And textbook contents and the examinable syllabus are not always identical — check the current official syllabus.
The project cycle at a glance: from workshop visit to finished product
The whole chapter is one project cycle, and every activity is one stage of it. This is the order to work through.
- Visit a local woodworking or bamboo workshop and observe how a carpenter decides, cuts and joins (p. 66).
- Pick one wooden or bamboo object and identify its material, parts and joints (pp. 67-69).
- Sketch the object and make a cardboard prototype to test the design (pp. 70-71).
- Build the real product using the eight woodworking skills (pp. 73-75).
- Make a bamboo product using bamboo’s own steps (pp. 76-78).
- Cost the product — materials plus labour — and compare it with the market price (p. 79).
- Carry out a real repair at school or home and record it (p. 80).
- Reflect: fill the activity timeline, write what you learned from others, and plan what else you can make (pp. 81-82).
Related Class 8 resources
This chapter sits inside the Kaushal Bodh (Vocational Education) book for Class 8. The links below lead to the rest of this site’s Class 8 material.
For study help organised by chapter, see the Class 8 vocational education notes, or start from the Class 8 hub to reach every subject in this class.
The chapter itself points to other projects in the same book. The Home Automation project is its alternative sample project, and project 4 continues the series. The main CBSE notes page is the entry point for all classes.
To verify the official edition and download the full book, use the official NCERT textbook portal.
Reference: NCERT Class 8 Kaushal Bodh textbook, chapter 3, official edition on ncert.nic.in.
Frequently asked questions
Where can I get the official NCERT Class 8 Kaushal Bodh Chapter 3 PDF?
The official PDF is on the NCERT website — use the download link at the top of this page, which opens the NCERT textbook portal for Kaushal Bodh Grade 8. The chapter is the third in the book, under the title “Work with Machines and Materials”. Everything on this page follows the same official pages.
What is the difference between hardwood and softwood in this chapter?
Hardwood comes from trees like babool, mango, jackfruit and teak; softwood from pine, deodar and eucalyptus. The fingernail test tells them apart — press your thumbnail into the wood: a scratch means softwood, no scratch means hardwood. Softwood is easier to cut and finish, so it is the right choice for a first product (NCERT p. 65).
Why does the chapter ask me to make a prototype first?
A prototype is a first model of a product, made from cardboard or waste softwood to check the design. It shows whether a design that looks good on paper actually works in three dimensions, reduces errors in the real object, and is cheap to modify (NCERT p. 70).
What are the four joints shown in Figure 3.6 and when is each used?
The four joints in Figure 3.6 are butt, mitre, lap, and mortise and tenon.
A butt joint joins straight edges at corners for simple frames; a mitre joint meets at 45 degrees for picture frames; a lap joint overlaps pieces for shelves and boxes; and a mortise and tenon — a tenon fitting into a mortise slot — is the strongest, used for doors, windows and chairs.
Is bamboo a wood or a grass?
Bamboo is a perennial grass, not a tree — it grows back when cut. It grows in almost all parts of India except the extremely hot desert of Rajasthan and the extremely cold desert of Ladakh. The culm, the hollow stem divided by nodes, is the part used for making products.
How do I work out the cost of the product I make?
List every material with its quantity and cost, and total them. Then add the hours of labour you spent on the product, and compare the total with the market price of a similar product (NCERT p. 79).
Explore Class 8 Vocational Education Books
Related chapters: