
This is the official NCERT Class 6 Kaushal Bodh Chapter 1, titled ‘Work with’ — one complete project, not a reading chapter: building a School Kitchen Garden. It runs to 33 printed pages.
The official work with class 6 chapter 1 PDF is offered right below. Everything the chapter actually contains — its activities, tools, safety rules, tables and figures — is explained after it, so you know what you are about to do before you begin.
The chapter lives in the Kaushal Bodh Grade 6 vocational education textbook published by NCERT. You can open the work with class 6 chapter 1 PDF on NCERT’s own textbook portal — the page for this book — where every chapter is hosted free for reading and download.
What This Chapter Is and Where the PDF Is
This chapter opens the book’s ‘Work with Life Forms’ theme — all living things, from human beings and animals to plants, insects and even bacteria. From that theme the book offers example projects, and Project 1, the School Kitchen Garden, is the whole of this chapter.
The book’s instruction is clear: you must take up only one project. You can choose one of the book’s examples or, with your teacher’s help, design a project of your own. That is why this chapter is done, not read — every page builds toward a real garden on your school campus.
This chapter page is part of the wider Class 6 vocational education collection on this site. If your school takes up the book’s other example instead, you will want the page for the second project of this book.
Work with Class 6 Chapter 1 at a Glance: What the Project File Contains
The table on this page shows what the chapter holds by the numbers — pages, sections, figures and tables. The words below say what those contents actually teach.
The project moves in garden order. First you visit an expert, then plan the garden, make vermicompost, prepare soil, sow seeds, care for the plants, watch them grow, harvest, check market prices and finally set a price for the produce.
Along the way the chapter gives you recording tables for nearly everything: Table 1.1 for tools, Tables 1.2 and 1.3 for sowing depth and spacing, Table 1.4 for growth observations, Table 1.5 for market prices and Table 1.6 for estimating the price of your produce. It also carries a safety page, ‘Did you know?’
boxes, a Smart Kitchen Garden with Artificial Intelligence section and closing reflection pages.
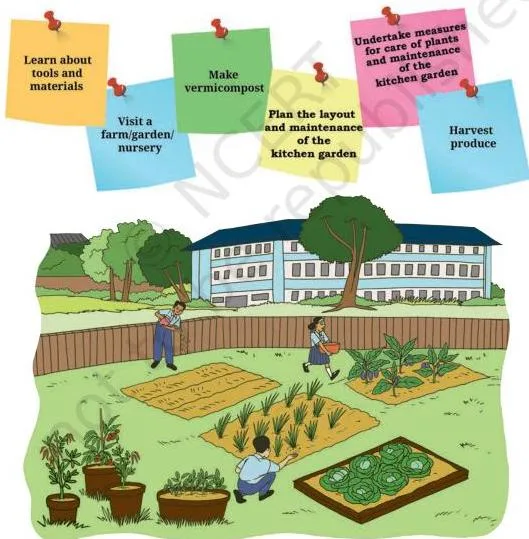
Figure 1.1 is the chapter’s opening picture — a school kitchen garden, tidy and growing. Keep it in mind as the target: everything from Activity 1 to Activity 10 builds this.
What You Will Actually Do: The Ten Activities of the Project
This chapter is not read — it is done. The ten activities build the kitchen garden one step at a time, and each one leaves you with a record you can show.
| Activity | What you do | What you learn or record |
|---|---|---|
| 1. Visit to a farm, nursery or garden | Prepare interview questions, meet a farmer or gardener, and answer the chapter’s questions about plants and soil | First-hand knowledge of how gardens are made and cared for |
| 2. Planning the school kitchen garden | Measure the land, choose beds, pots or both, and consider sunlight, drainage and spacing; pick fast-growing herbs and leafy greens | A written plan you can defend |
| 3. Making vermicompost | Build a worm bin and let earthworms convert kitchen waste into fertiliser. The book’s numbered headings jump from Activity 2 to Activity 4, with this section sitting in between as the third activity | How organic waste becomes fertiliser |
| 4. Preparing the garden for planting | Clear debris, rocks and unwanted plants, then mix manure into the soil as your teacher directs | A clean, nutritious seedbed |
| 5. Sowing seeds and planting seedlings | Read the seed packet, make furrows, sow at the recommended depth, transplant seedlings at the same soil level, and label rows | Tables 1.2 and 1.3: sowing depth and plant-to-plant spacing data |
| 6. Taking care of plants | Fence, stake, water, mulch, apply organic pesticide and weed | Six routines that keep plants alive |
| 7. Observing plants grow | Note height, leaf colour, flowers and pests each week in a diary | Table 1.4 growth record, plus photos or sketches |
| 8. Harvesting | Pick crop by crop: cut leafy greens, pull roots, snip fruit with shears | Clean, sorted produce, ready to use |
| 9. Visiting the vegetable market | Observe vegetables and fruits and note their prices | Table 1.5 market price chart |
| 10. Setting a price | Fill the cost sheet: what you grew, what you spent, quantity, market price, expected money | A reasoned price, then a decision with teacher and peers |
Activity 1 begins with a visit. The chapter asks you to prepare interview questions before you go — which plants are grown, whether they were all planted at the same time, how the soil is prepared, how plants get extra nutrition and how they are protected from animals and pests.
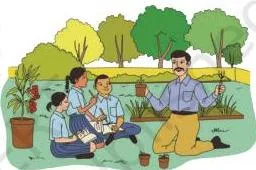
Figure 1.4 shows the scene the chapter wants for you: a student learning directly from an expert. The two most interesting things you learnt during the visit go into your written record.
One ‘Did you know?’ box ends the activity pages with a surprise: plants can be grown without soil. Take a cutting of a money plant, place it in an old bottle filled with water, keep it in bright but indirect sunlight and change the water every week.
Kitchen Garden Essentials: Tools and Materials and What Each Is For
Before you touch soil, the chapter makes sure you can recognise the things you will use. Table 1.1 lists fifteen tools and materials, each with a sketch and a plain use.
| Tool or material | What the chapter says it is for |
|---|---|
| Garden trowel | Digging up soil and planting seedlings |
| Hand cultivator | Loosening soil, removing weeds and mixing manure in soil |
| Watering can with rose head, or hose pipe | Watering plant beds, pots, seedlings and plants |
| Gardening gloves (rubber) | Protecting hands and giving a firm grip on tools |
| Gardening shears | Cutting branches, twigs and stems |
| Seeds, seedlings, bulbs, rhizomes, cuttings | Growing the plants in the garden |
| Potting soil or mix | Filling containers or pots (a blend such as compost, perlite, vermiculite, soil, coir or peat-moss) |
| Organic mulching materials (grain straw, leaf mould, shredded leaves, grass clippings) | Retaining moisture and suppressing weeds |
| Plant labels | Identifying the different plants in the garden |
| Old pipes, wooden sticks, bamboo or metal poles, and string | Making the protective fence |
| Bin and tarpaulin or old thick cloth | Preparing compost or vermicompost, which feeds the plants |
| Neem leaves and a jerry can or large bottle | Preparing organic pesticide against harmful insects |
| Manure | Natural fertiliser made from the dung of farm animals, adding nutrition to plants |
| Spray bottle | Spraying a small amount of a liquid, like the pesticide |
| Spade | Digging, edging and moving soil or other materials |
The chapter adds a reassuring note: if you cannot get all of these, do not worry — ask your teacher or an expert for alternatives.
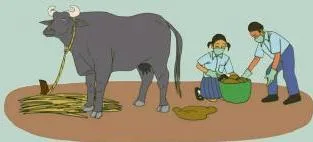
Manure is the tool-list’s natural fertiliser: dung from farm animals, used for generations to feed the soil. Figure 1.2 shows that traditional material ready for use.
The Skills the Project Builds: What You Should Be Able to Do at the End
Page 4 of the chapter states five abilities the project is designed to give you. They are worth reading now, because each activity is a checkpoint on the way to them.
- Identify common gardening tools, equipment and materials, and describe their uses.
- Prepare soil either on the school ground or in pots, using gardening tools.
- Plant seeds or seedlings and help them grow through watering, manure, fertilisers and care.
- Keep the plants in the kitchen garden safe with fencing and organic pesticides.
- Harvest the produce from the garden or the pots.
These five abilities are exactly the goal of the whole unit. Hold them up against what you do in each activity and you will know whether the project is on track.
Safety First: How the Chapter Says to Work Without Getting Hurt
Most garden accidents come from lifting, tools and carelessness, so the chapter puts a full page of precautions before the first activity.
- Ask your teacher the correct way to lift pots; if a pot feels too heavy, get someone to help you — never lift it alone.
- Wear well-fitting gloves when handling tools and materials, so you get a firm grip.
- Follow instructions while using gardening tools, and pay attention during demonstrations to learn the correct technique.
- Always ask for help if you are unsure how to use a tool.
- Clean tools regularly and wipe them dry after washing to prevent rusting.
- Store tools in an organised way on shelves or in a store, so nobody trips over them.
- On the internet: ask your teacher for help, check before uploading or downloading anything, and never share personal information.
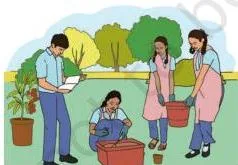
Figure 1.3 gathers the safety habits in one picture: lift pots carefully and never alone, use tools the right way, wear gloves, and follow the instructions that come with the tools.
How the Garden Is Made: Soil, Sowing, and Care in Order
Activities 4 to 8 follow one method, in order: prepare the soil, sow, care, observe and harvest. The diagrams for these stages appear in the walkthrough below.
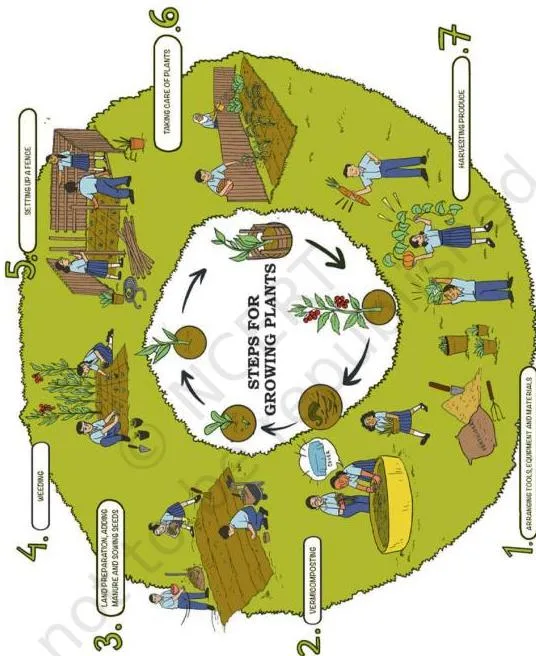
Figure 1.5 shows the chapter’s aim at every stage — plants growing close together, healthy and carefully nurtured. Each stage below is a piece of that picture.
Stage 1: Prepare the soil (Activity 4)
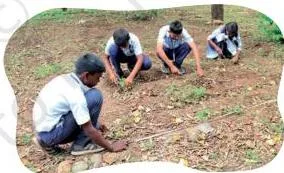
Clear the soil of debris, rocks and unwanted plants that could crowd the crop, then mix manure into the soil as your teacher directs. Clean soil gives plants room to grow and nutrition to use.
Stage 2: Sow seeds and plant seedlings (Activity 5)
Before planting, read the seed packet for depth, spacing and season. Make furrows at the recommended spacing, drop in the seeds (sprinkle very small seeds over the surface), cover lightly and pat the soil down for good seed-to-soil contact.
For seedlings, dig a hole slightly larger than the roots, set the seedling so the soil level matches its container, press gently around the base, and label each row with the plant name and the date of sowing. Labels can be made from old plastic bags stuck on waste cardboard or chart paper.
Stage 3: Care for the plants (Activity 6)
First make the fence — bamboo or locally available poles bound with strong string — to keep animals and people from stepping on the plants. Then keep up the regular care:
- Staking: support tall or weak plants such as tomatoes, cucumbers, peas and beans by tying them to a stake (bamboo, an old branch or an old pipe), sized to the plant’s height and weight.
- Watering: keep the soil consistently moist but never waterlogged; water early morning or late afternoon to cut evaporation, and give new plants more frequent water.
- Mulching: spread straw, wood chips or shredded leaves around plants to hold moisture, suppress weeds and keep soil temperature steady.
- Organic pesticide: apply a neem-based spray only as needed, following the recipe below, so helpful insects and birds stay safe.
- Weeding: check regularly and remove weeds as soon as they appear, using a hand cultivator or an alternative your teacher suggests.
Between care and harvest, the chapter invites you to decorate: paint stones around the beds, make painted clay pots or sculptures from old objects, or build a scarecrow to keep birds away. Its stated inspiration is the Rock Garden that Shri Nek Chand built in Chandigarh from waste material.
Stage 4: Harvest the produce (Activity 8)
Ask your teacher how each crop should be harvested. Leafy greens such as lettuce and spinach use cut-and-come-again — cut the outer leaves and the inner leaves keep growing. Root vegetables like carrots and radishes get loosened soil and a gentle pull. Tomatoes, brinjals and peppers are cut from the vine with shears, leaving a short stem.
Sort what you pick by quality and size, and remove any damaged produce so only the best remains.
The Organic Pesticide Recipe: What the Chapter Teaches You to Make
The chapter’s answer to pests is organic, and you can make it yourself from leaves. Neem-based pesticide controls caterpillars, grasshoppers, whitefly and aphids.
- Take 500 grams of neem leaves — or another bitter leaf recommended by an expert at a Krishi Vigyan Kendra or Agriculture Research Centre — wash them, and chop or break them into smaller pieces.
- Mix the neem leaves with 5 litres of water.
- Put the mixture in a jerry can or large bottle and leave it for about 14 days.
- Separate the suspended solids from the liquid using a strainer.
- Spray the liquid on your plants with a spray bottle.
The point of an organic spray is to protect the crop without harming the insects and birds that help the garden, so the chapter says to apply it only as needed and to follow instructions carefully.
Making Vermicompost: How Worms Turn Kitchen Waste into Fertiliser
Before the soil is prepared, the chapter teaches you to make the richest fertiliser of all: worm-made compost. Red earthworms (Eisenia fetida) eat kitchen waste and leave dark, crumbly compost behind.
- Use a bin made of plastic, wood or another water-resistant material, covered with tarpaulin or an old thick cloth, with holes at the bottom so extra water drains out.
- Fill the bin with biodegradable waste — kitchen waste, fallen leaves, garden waste, or organic waste from the school’s midday meal — as the bedding material.
- Add water to moisten the bedding, following the teacher’s instructions.
- Place red earthworms (Eisenia fetida) on top of the bedding and let them burrow in. You can get them from a farm or nursery.
- Feed the worms kitchen scraps such as fruit and vegetable peelings, coffee grounds, eggshells and non-greasy food waste.
- Keep the bedding moist by spraying it as needed — never waterlogged — and keep it covered with a lid to hold moisture and keep pests out.
- After a few months, collect the dark, crumbly, earthy-smelling compost from the bottom of the bin.
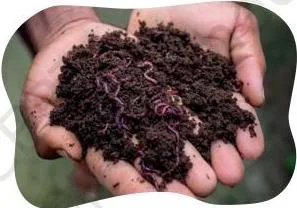
Figure 1.7(a) shows the bin at its start: red earthworms on the bedding, ready to burrow in. What the worms eat decides how well the bin works:
- Safe to add: fruit and vegetable peelings, coffee grounds, eggshells, non-greasy food waste.
- Avoid: meat, dairy, oily foods and citrus fruits — they attract pests or harm the worms.
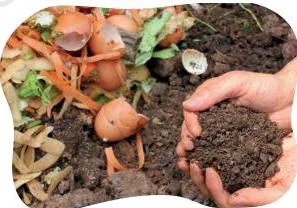
Figure 1.7(b) shows the finished product — dark, crumbly compost made from leftover food scraps. That is the fertiliser you mix into the garden soil. If earthworms are not available, the chapter notes you can still make compost with a slightly different process — search the Internet for ‘vermicomposting of solid waste’.
Figure Walkthrough: Reading the Diagrams in the Chapter


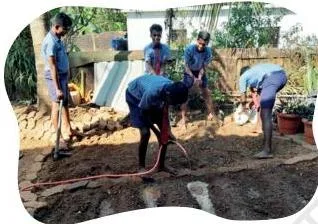
The numbered diagrams in the chapter carry its visual lessons — the layout plan, the methods and the tools in action. Each figure below is labelled as it is in the book and connected to the activity it belongs to.
Figure 1.6 shows the plan before the digging: beds measured and laid out on the school ground. This is Activity 2’s product — the decisions about sunlight, drainage and spacing that let every plant be reached while watering.
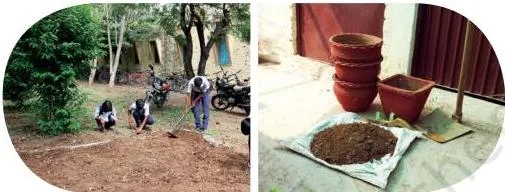
Figure 1.8 sets out the two ways the project can be made: plant beds on the left, pots on the right. Both need the same soil preparation in Activity 4 — clear debris, mix manure, then plant.
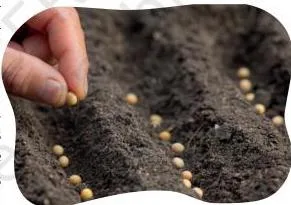
Figure 1.9 is the middle of a sow: seeds dropping into straight furrows. It matches steps (a) and (b) of Activity 5 — furrows at the packet’s spacing, seeds dropped in, very small seeds sprinkled over the surface.
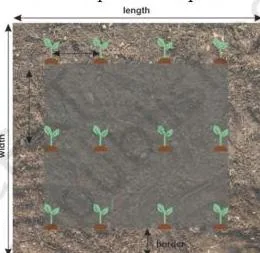
Figure 1.10 shows the gap the chapter keeps asking about — plant to plant space. This is the measurement you record in Table 1.3, because crowded plants compete for light, water and food.
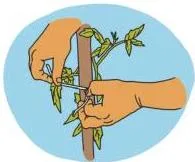
Figure 1.11 shows staking — a tall young plant tied to a stake. Tomatoes, cucumbers, peas and beans need this support so they do not fall over as they grow heavy.
Figure 1.12 shows freshly sown beds being watered. The chapter pairs this with two rules: keep the soil moist but never waterlogged, and water in the early morning or late afternoon.
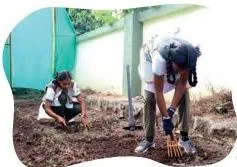
Figure 1.13 is weeding with a hand cultivator. Weeds steal water and nutrients from the crop, so the chapter says to remove them as soon as they appear.
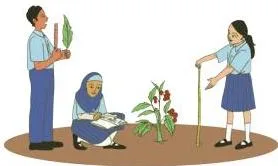
Figure 1.14 is the observation habit behind Table 1.4 — a student noting plant growth. Height, leaf colour, flowers and pest attacks all belong in the weekly record, along with photos or sketches of the garden.
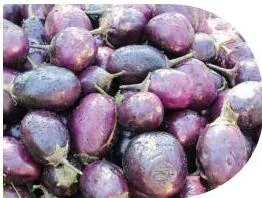
Figure 1.16 shows the brinjal twice: the plant bearing fruit in the garden, and the harvested brinjals after cutting. Brinjals, tomatoes and peppers are cut from the vine with shears, leaving a short stem attached.
Common Mistakes Students Make in This Project
First-time gardeners all tend to make the same errors. The chapter’s instructions are written to prevent exactly these — the table names each mistake, the correct rule and the way to check yourself.
| Mistake | Correct rule | How to check your answer |
|---|---|---|
| Planting seeds too deep or too close | Read the seed packet for recommended depth, spacing and season before sowing | Record the depth in Table 1.2 and the spacing in Table 1.3 |
| Overwatering the beds | Keep the soil consistently moist but never waterlogged | Feel the soil before watering; let the bed drain |
| Watering in the middle of the day | Water in the early morning or late afternoon to minimise evaporation | Follow a fixed schedule for watering |
| Forgetting to label plants | Write the plant name and sowing date on every label | Place labels at the start of each row or on each pot |
| Reaching for chemical pesticides | Use the chapter’s organic neem-based spray, and only when needed | Follow the 500 g neem + 5 L water recipe; protect helpful insects and birds |
| Letting weeds take over | Remove weeds as soon as they appear, using a hand cultivator | Check the beds regularly, every week |
| Skipping the observation record | Record height, leaf colour, flowers and pests weekly in a diary | Fill Table 1.4 week by week, or photograph the garden |
Notice the pattern: every mistake is a skipped instruction — a packet not read, a record not written, a check not made. Follow the chapter’s tables and most of these disappear.
Pricing the Produce: The Chapter’s Simple Cost-and-Sale Calculation
What happens to the harvest? The chapter suggests giving the produce to the school kitchen for the midday meal, or deciding with your teacher and peers. If you were to sell it, Table 1.6 shows how a price is estimated.
The table asks five things per crop: what you grew, what you spent on seeds and materials, the quantity harvested, the market price, and the money you would get. Market price times quantity gives the expected money.
Step 1: Note the money spent.
Suppose your group spent ₹100 on coriander seeds and soil mix.
Step 2: Note the harvest.
The garden produced 250 g of coriander.
Step 3: Use the market price.
If the market sells coriander at ₹60 per kilogram, then ₹60 buys 1000 g.
\[ \text{Expected money} = 250\ \text{g} \times \frac{60\ \text{₹}}{1000\ \text{g}} = 15\ \text{₹} \]
Final answer: the 250 g harvest would bring about ₹15 at the market. The check is easy — 250 g is a quarter of 1000 g, and a quarter of ₹60 is ₹15.
The point of the calculation is not profit — it is learning to estimate a price honestly. Filling column 5 lets you compare the expected money with what you spent in column 2, and that comparison is the discussion you take to your teacher and peers.
Ancient Roots and a Smart Future: Vrikshayurveda and the AI Garden
Two special pages frame the project — one looks back at ancient Indian plant science, the other forward to Artificial Intelligence. Both are easy to skip, and both widen what the garden teaches.
The chapter’s ‘Did you know?’ box introduces Vrikshayurveda — the Ayurveda of trees, the distilled wisdom of plant health and plant-disease treatment from ancient Bharat. Two texts carry the name, one by Salihotra (around 400 BCE) and one by Surapala (1000 CE); the only surviving palm-leaf manuscript of Surapala’s text is kept at Oxford University.
- What the text covers: cultivation of many plant species, water management, soil conservation, fertilisers, and plant diseases with their treatment.
- What it encouraged: planting sacred trees such as Bilva (bael), Nyagrodha (banyan), Ashwattha (fig) and Neem, since planting trees was seen as a way to attain the goals of human life.
- Why it matters now: climate change, soil erosion and health concerns have renewed interest in this traditional knowledge for soil health and good agricultural practice.
The final special section shows a smart kitchen garden using AI. The chapter presents it as something you can design, not something forced on the project.
- AI apps suggest suitable plants for your location and when to plant them.
- Apps help plan the bed or pot layout by sunlight and spacing requirements.
- Image recognition identifies unfamiliar plants — weeds, or plants from seeds left over from the previous season.
- Apps track growth, suggest watering schedules and manure, and help detect pests early.
Geotagging — adding location information to a photo or post — is the chapter’s optional record of the garden. The book notes you can geotag a garden even if it is made in pots.
Reflection and Extension: What the Chapter Asks You to Write and Try
The project never ends at harvest. The chapter’s last pages ask you to look back, count your time and extend the garden beyond school.
Under ‘What did I learn from others?’, write the three most important things you learnt from people — about making a garden, looking after plants, or simply working together. The ‘What did I do and how long did it take?’
page has a chart with one row per activity; fill in the number of periods each one actually took, adding any extra activities you did.
- Design a container garden at your home, and discuss the materials and steps with your teacher.
- Find out the scientific names of the plants you have grown.
- Geotag your kitchen garden with its longitude and latitude coordinates.
Finally, ‘Think and Answer’ asks four personal questions — what you enjoyed, the challenges you faced, what you would do differently, and the conditions that helped your plants grow (or what to change if they did not).
It also asks what jobs relate to the project; the chapter names farmer, gardener, agricultural scientist and mechanic for agricultural equipment such as tractors and harvesters.
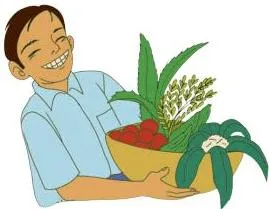
Figure 1.15 is the chapter’s closing image — enjoying the produce of your labour. It is the answer to the project’s first question: a kitchen garden produces food, and you made it.
Sources and Data Verification
This listing is maintained for the 2026-27 academic session using the NCERT textbook information available to us. NCERT remains the authority for confirming the latest edition.
This page describes the NCERT Kaushal Bodh — Grade 6 (vocational education) textbook, Chapter 1, titled ‘Work with’, for the project ‘School Kitchen Garden’. The chapter runs to 33 printed pages and is an activity-based project unit, not a text chapter with exercises.
The activities, tools, tables, safety rules and figures described here are from the published NCERT textbook. This page covers this book only, not the whole CBSE vocational education scheme.
The listing is maintained for the current academic session using NCERT’s published textbook. NCERT settles the textbook, its editions and its official PDFs; CBSE settles curriculum matters. Textbook contents and the examinable syllabus are not always identical, so check the current official syllabus where it applies.
| What the chapter holds | Count | Where it is used |
|---|---|---|
| Printed pages | 33 | |
| Figures with NCERT captions | 21 | |
| Tables | 9 | |
| Official NCERT PDF | Download the chapter PDF | the chapter exactly as NCERT publishes it |
Reference: NCERT Class 6 Kaushal Bodh textbook, chapter 1, official edition on ncert.nic.in.
For more help, browse other Class 6 study resources or the full notes library on this site.
Frequently Asked Questions
What is ‘Work with’ in Class 6 Kaushal Bodh?
‘Work with’ is the title of Chapter 1 of the NCERT Kaushal Bodh textbook for Grade 6 (vocational education). The chapter opens the book’s ‘Work with Life Forms’ theme and is entirely one project: the School Kitchen Garden, running to 33 printed pages of activities, tables and records.
What do I have to do for the School Kitchen Garden project?
Create a kitchen garden on your school campus, either in plant beds or in pots, and take it through ten activities: visit an expert, plan the garden, make vermicompost, prepare the soil, sow seeds or plant seedlings, care for the plants, observe them grow, harvest, visit the vegetable market and set a price for the produce.
You record each stage in the chapter’s tables.
Which tools and materials do I need for a kitchen garden in Class 6?
The chapter’s Table 1.1 lists fifteen items: garden trowel, hand cultivator, watering can or hose pipe, gardening gloves, gardening shears, seeds and seedlings, potting mix, mulching material, plant labels, fencing poles and string, a bin and tarpaulin, neem leaves and a container, manure, a spray bottle and a spade.
If any is unavailable, ask your teacher or an expert for an alternative.
How is vermicompost made in this project?
Fill a water-resistant bin with holes at the bottom with biodegradable waste, moisten it, add red earthworms (Eisenia fetida), and feed them kitchen scraps — peelings, coffee grounds, eggshells and non-greasy waste. Avoid meat, dairy, oily food and citrus. Keep the bedding moist, and after a few months take the dark, crumbly compost from the bottom.
How do I make the neem-based organic pesticide?
Take 500 g of neem leaves, wash and chop them, mix with 5 litres of water in a large bottle, leave for about 14 days, strain off the solids, and spray the liquid on the plants. The chapter says neem-based pesticide controls caterpillars, grasshoppers, whitefly and aphids.
Is the smart kitchen garden with AI part of the project?
It is optional. The chapter says you can design and make a smart kitchen garden utilising AI — apps can suggest plants for your location, plan the layout, identify weeds by image recognition, schedule watering and detect pests early. Geotagging your garden with location details is also an optional record.
What is the project supposed to teach me by the end?
The five abilities on page 4: identify common gardening tools and describe their uses; prepare soil in the ground or in pots; plant seeds or seedlings and help them grow with water, manure and care; protect plants with fencing and organic pesticides; and harvest the produce.
Explore Class 6 Vocational Education Books
- Next: Project 2
Related chapters:
- Work with Machines and Materials
- Project 4
- Project 5